Search Knowledge Base
Automator workflow
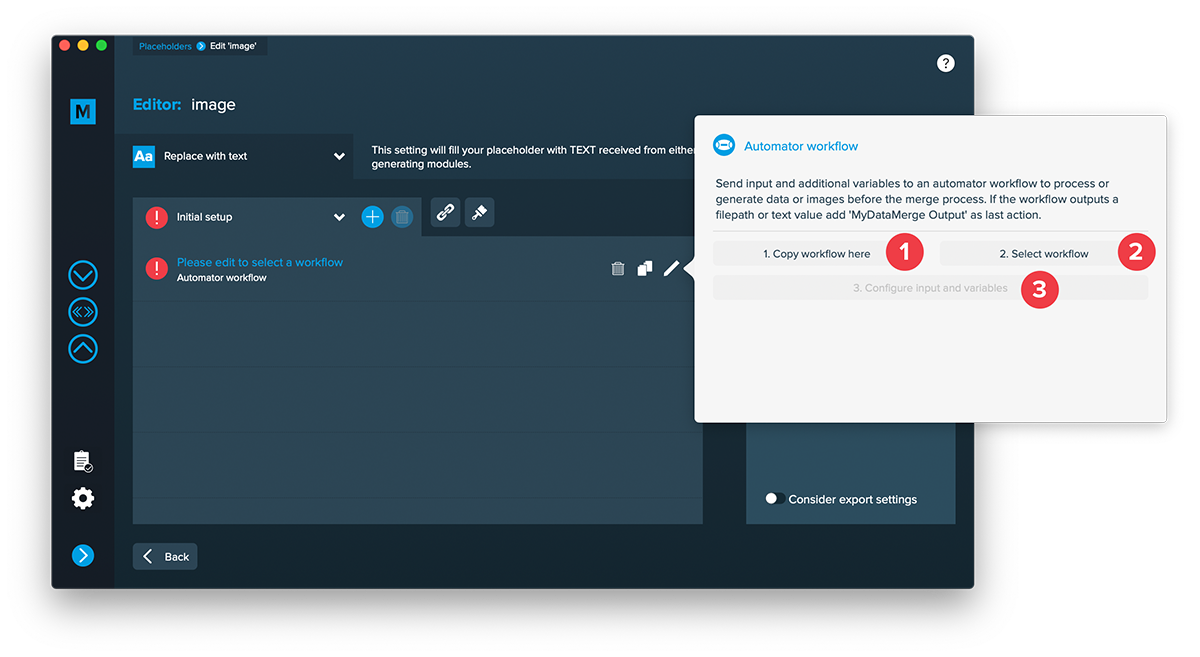
Automator workflow as element allows you to create or modify content by using an automator workflows BEFORE the data merge process. Once added the element (check here on how to do so), just follow the three steps:

1. Copy workflow
MyDataMerge can only access your workflow if its located in a specific folder. The reason is a security layer of OSX. Click the button, copy the workflow in the Finder window that opens.
2. Select workflow
Select your workflow, then the third button “Configure input and variables” and the automator settings will be unlocked/visible.
3. Configure input and variables
Input is the value an automator workflow starts with. Learn more about automator workflows here.
Variables can contain additional data for the workflow. Learn more about variables in the video here.
Settings
The settings icon will become available once the setup of your automator workflow element is valid (green checkmark).

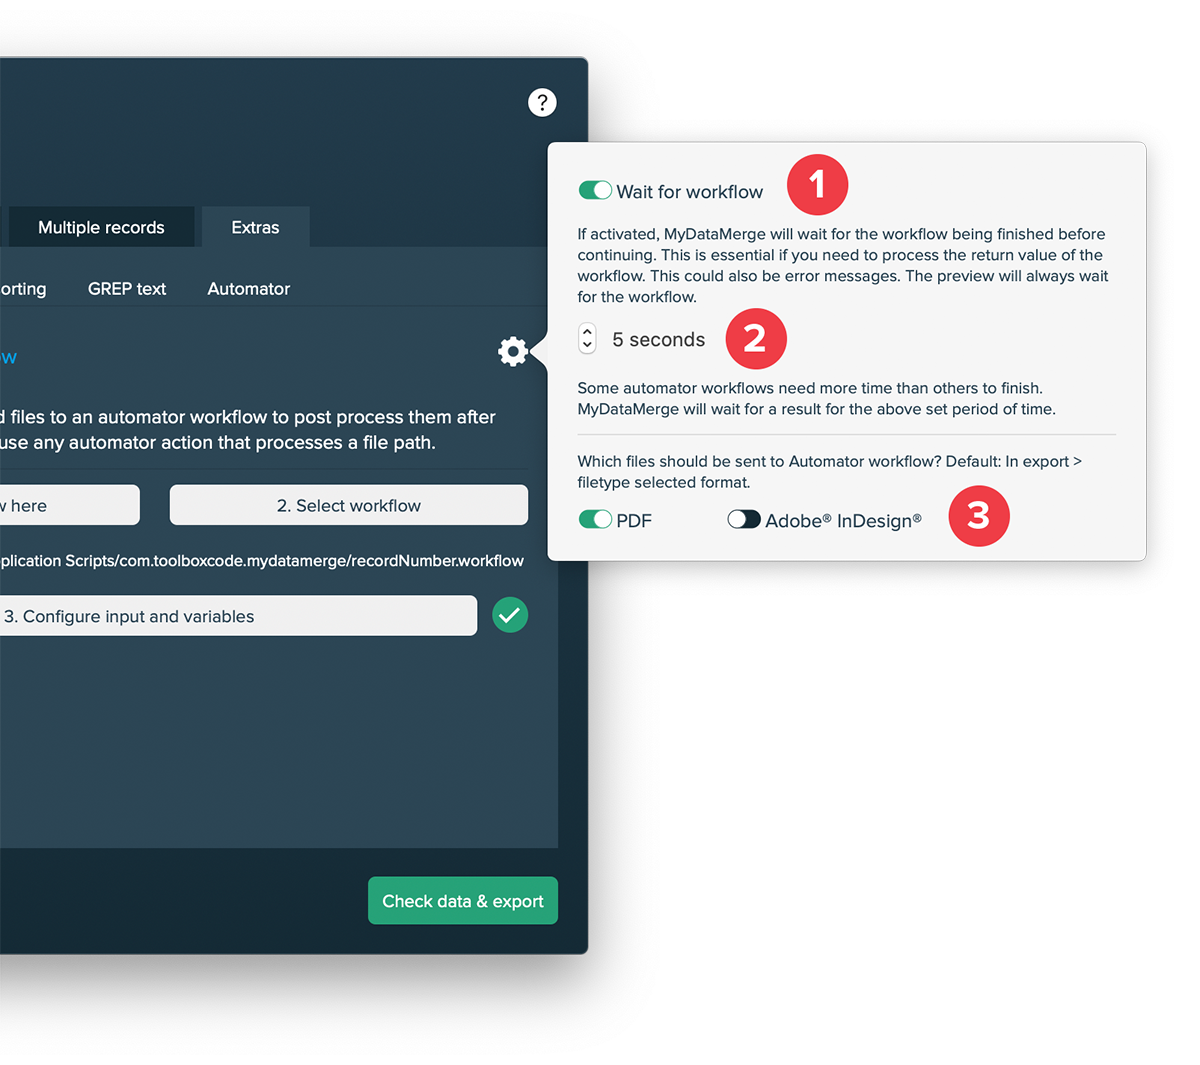
1. Wait for workflow
This setting makes MyDataMerge wait for the workflow. It is turned on by default. It’s required if you want to have error messages returned from your automator workflow OR if you need the return value.
If you turn it off, MyDataMerge will continue without receiving any response ever. This makes the merge process faster but you won’t get any message or return value from your automator workflow.
If you have a workflow that writes a log for example, you can turn it off as no return value is required. If you have sensitive data to process with the workflow you should leave it on, otherwise you will not recognise any error happening.
2. Timeout limit
If “Wait for workflow” is turned on, this is the maximum time (in seconds) MyDataMerge will wait for the automator workflow tu return a value. If the limit is reached, a timeout error will be logged.
3. Filetypes to process (only available in export > extras > automator)
By default, the filetype selected in the export filetype options is turned on here. If additional files are created (with the option “Keep InDesign documents too” or “Create InDesign book”) you will have more options here.
Note: If you change the selection in the export filetype options this will be resetted to default.
Advanced: Using variables
For using variables, please refer to the video in the use case demonstration.