1 MyDataMerge configuration
Editing image placeholders
How to download images
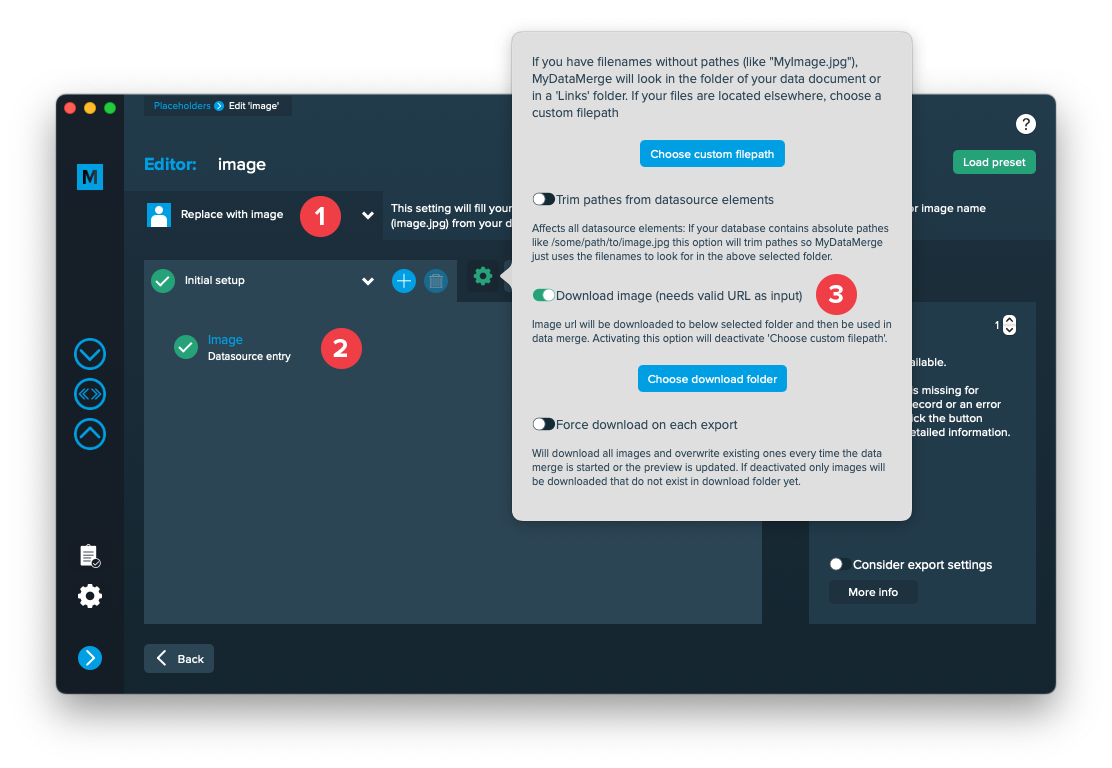
To advice MyDataMerge to download images please follow these instructions
- Make sure your image placeholder has the right type “Replace with image” [1]
- Add a datasource element and select the column with the image URLs [2]
- Open the settings (gear icon), and activate “Download image” [3]. You may additionally select a folder where to download the images to
Issues that may arise
- By default, MyDataMerge checks for file name extensions of images. e.g. “https://www.myserver/path/to/myimage.jpg” -> .jpg – If it doesn’t find any, an error will be thrown. You can disable this behaviour in the preferences > editor > Disable file extension check for downloaded images
- If images change online, MyDataMerge doesn’t know that. At the first time an image is downloaded, it will be cached and not re-downloaded by default (for a better performance). You can force a download everytime by activating “Force download on each export” in the image settings (check the image above).
2 Export
Filetypes
CSV export
With CSV selected in Export > Filetype, MyDataMerge will export a Adobe® Indesign®’s data merge compatible CSV file. Use this option if you don’t want to merge with MyDataMerge but want to use MyDataMerges ability to customise the data.
Please note: Both CSV options …
- CSV (export only) – Exports a CSV file
- CSV (export and link) – Exports a CSV file and links it with your data in InDesign so you can continue with the data merge there
… cannot handle MyDataMerge specific actions like:
- Applying styles
- Applying the last action if a setup fails
- Applying GREP actions
- Applying Hyperlinks
- Use Automator workflows after export
If you need any of these please use MyDataMerge for merging your data.