1 MyDataMerge configuration
Configurations
Add hyperlinks to setups
You can add Hyperlinks dynamically to your placeholders, no matter if its a text, image or QR-Code placeholder. After applying hyperlinks, a reader can click on the element to open the hyperlink.
Note: Hyperlinks will only work if you export to InDesign files or interactive PDF files.
How to add Hyperlinks
Hyperlinks are part of a setup – this gives you the full advantage of a setups flexibility (e.g. to apply different hyperlinks to the same placeholder based on conditions). To add a hyperlink, open the placeholder in the editor and click the hyperlink icon [1] to open the hyperlink panel. Then enable the hyperlink [2] and start with your configuration:
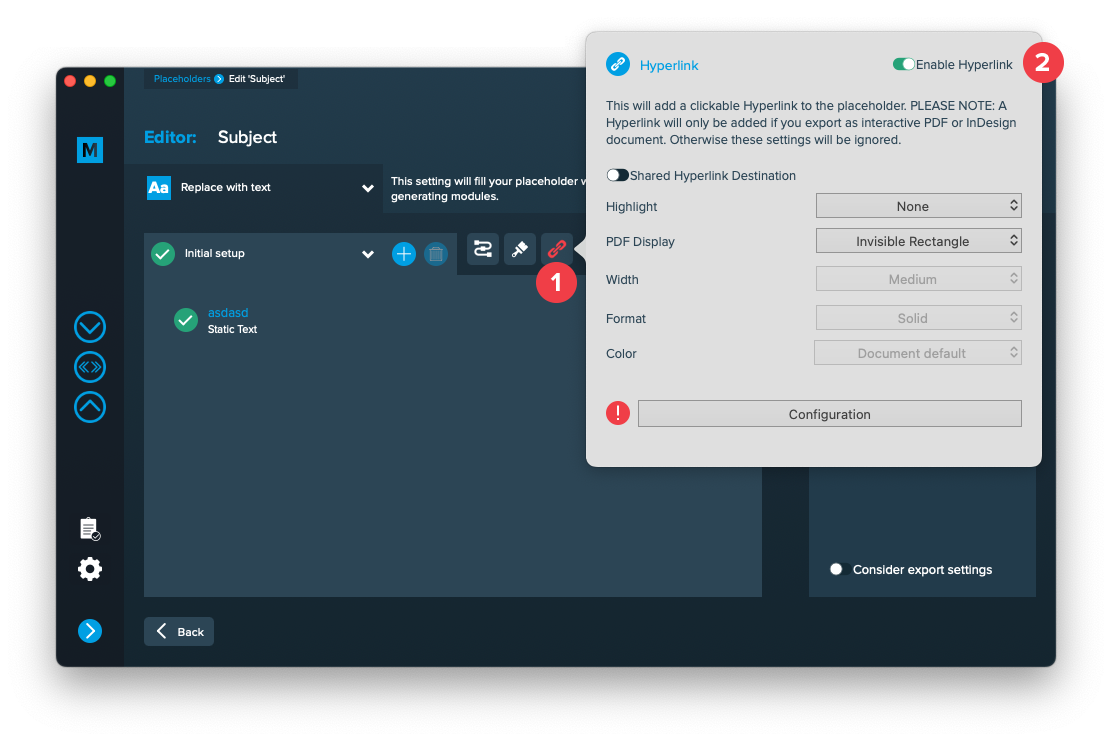
Shared Hyperlink destination
This is only useful if you have multiple hyperlinks with the same target and need to continue working with your InDesign layout. With this option turned on, only one hyperlink target will be created in your layout document and be shared for multiple hyperlinks. With this option turned off, a new target will be created for each hyperlink.
Highlight
Selects the highlight effect of the hyperlink
PDF Display
Selects the kind of frame around the hyperlink. Selecting “Visible Rectangle” will unlock the options below to further style the frame.
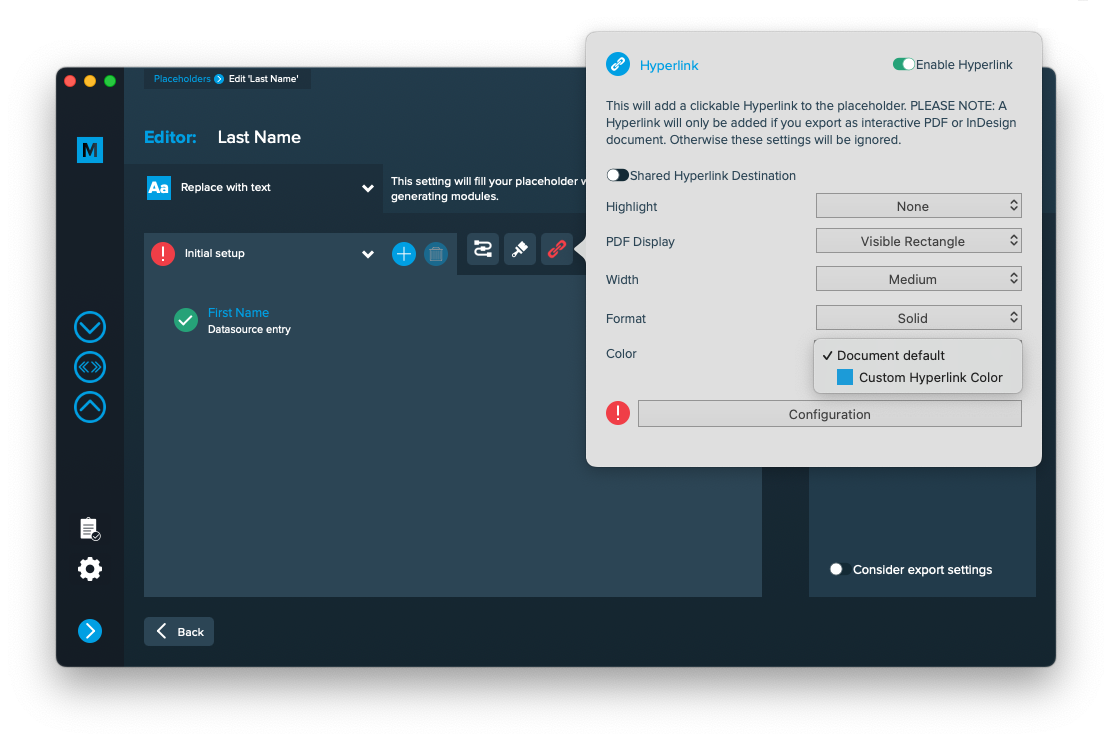
Width
The width of the rectangle (thin, medium or thick)
Format
The format of the rectangle (solid or dashed)
Color
The RGB color of the rectangle. All RGB swatches (and only RGB) from your document are imported automatically and will be selectable next to “Document default”.

Configuration
The configuration button opens another editor to configure the hyperlinks content. You can select a hyperlink type and edit every item like a text placeholder to inject data into a hyperlink.

2 Export
Extras
Setup GREP replacements
GREP text actions allow you to search and replace specific strings matching custom search patterns with other strings or patterns AFTER the merge process is completed. They are applied to all documents generated.
Go to Export > Extras > GREP text
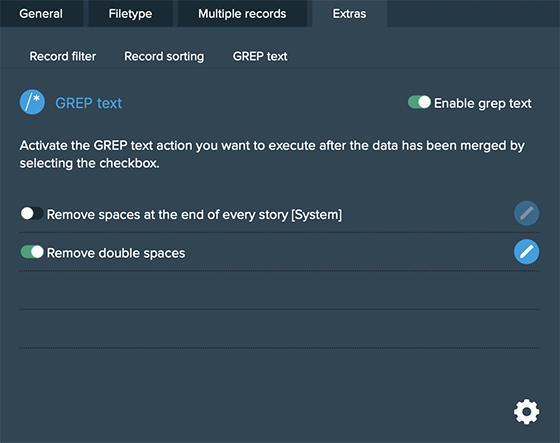
Here you can activate or deactivate your configured GREP text replacements. To edit them click on the pen icon of each row, to add new ones click on the gear icon in the bottom right. This will take you to the preferences where you can add new actions or delete existing ones (Note: Predefined actions cannot be deleted. They are flagged with [System] at the end of the name):
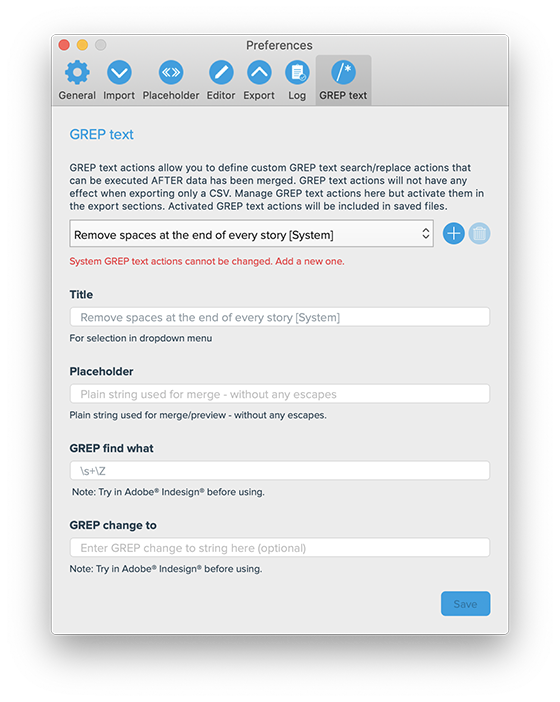
GREP text actions are stored locally on your machine. Only activated actions will be added to project files.