1 Layout preparation & import
Multiple records
Multiple records (prepared layout)
This is the most effective approach to apply multiple records to one layout (with one or more pages). To tell MyDataMerge where your records should go in the layout you need to create multiple groups of the same instance.
Example – Multiple business cards with front and rear side
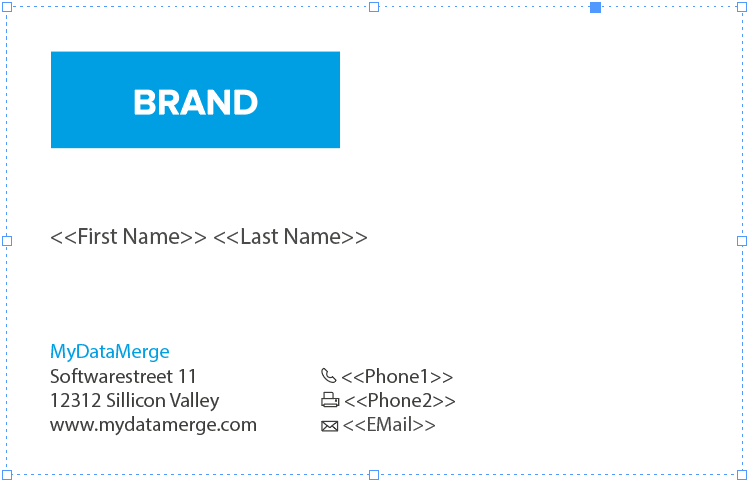
You have a business card that you want to have 8 times on a sheet including their rear sides. First of all, layout one business card with all placeholders you need and group it. By grouping it, MyDataMerge knows now that all the placeholders inside the group belong together.
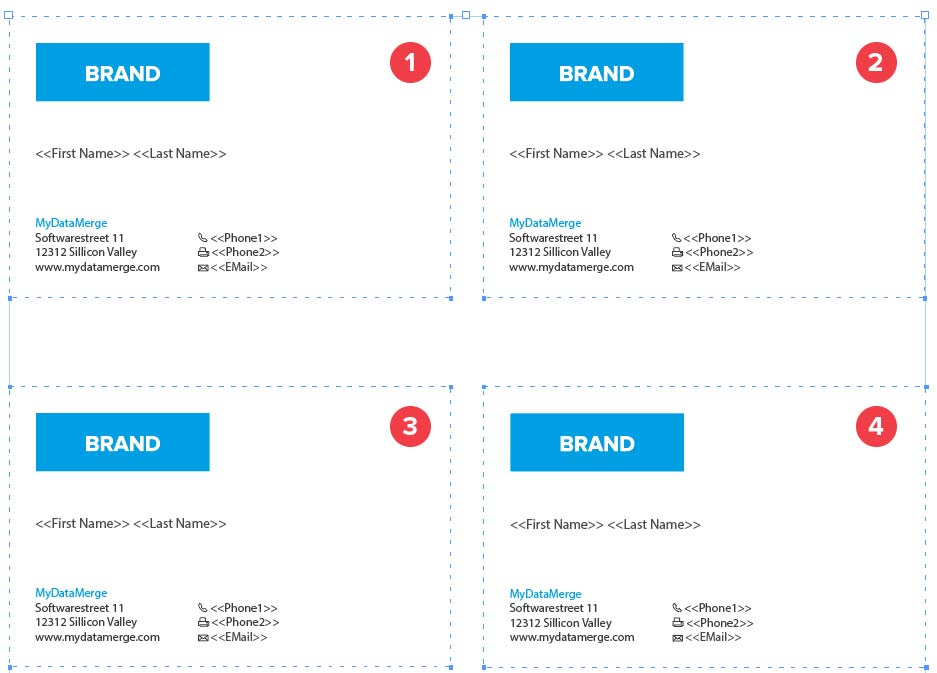
Next, duplicate (or copy/paste) the group to create another business card. Arrange it on your sheet in the order you want the data to be merged. This can be from left to right like in the below example [1 to 4] or right to left, or up to down …
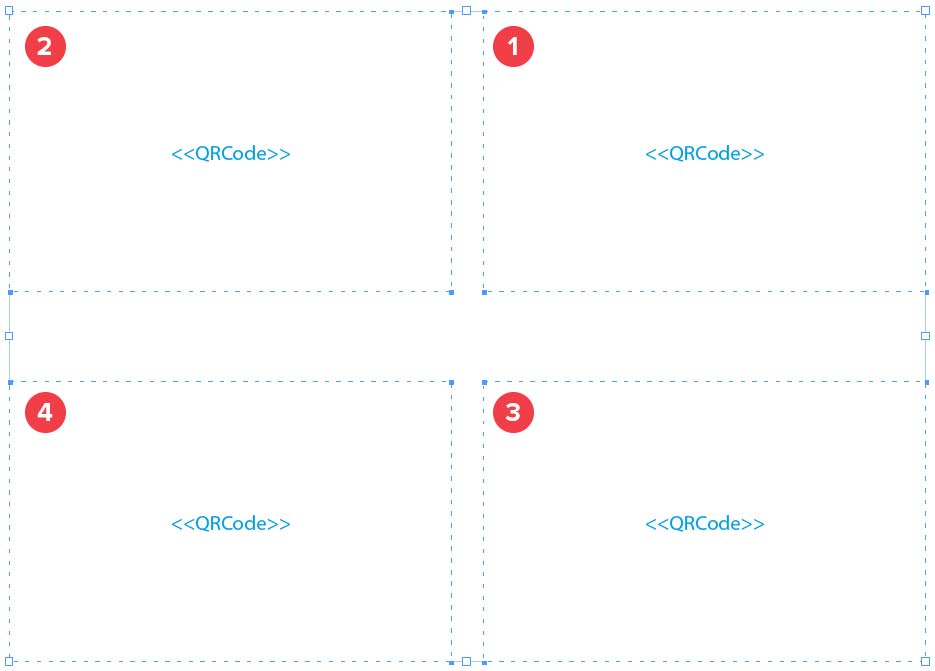
Now on the next page you arrange groups of the rear sides of the business cards, but as the rear side is mirrored you need to start from right to left [1 to 4] with arranging groups:
Remember: The groups tell MyDataMerge which placeholders belong together and the order you arrange the copies with represents the order the records are merged.
2 MyDataMerge configuration
Configurations
What are setups and why do i need them?
Once you open a placeholders editor you will see that you can select a replacement type to show MyDataMerge what kind of data you want to inject [1] to that placeholder and you can select a setup [2]. Initially there’s a setup called “Initial setup” you can work with. But you can add as many others as you like.
![]()
In the center area (“Add item to ‘Initial setup'”) you can configure the output to be injected in the merge process dynamically. Each setup can have custom style settings (brush icon) and a custom hyperlink setting (chain icon).
By default, only the selected setup is used for the merge process. But setups become really powerful once you add them in a row (if first fails use second then third …) (path icon) or use them based on conditions (“If ‘First Name’ is ‘John’ then use this, otherwise use that).
Add multiple setups
For every placeholder you can add more than one setup.
If you have a well formed database with no missing data, usually one setup is enough. More than one setup will come in handy in situations where this isn’t the case or where you want to apply different styles.
Example:
You have a subject line in a letter where you want to output a salutation and last name e.g. “Dear Forrest” where “Forrest” is the first name and comes from the database and “Dear” is a static text. You can do this easily with a simple setup of your placeholder:
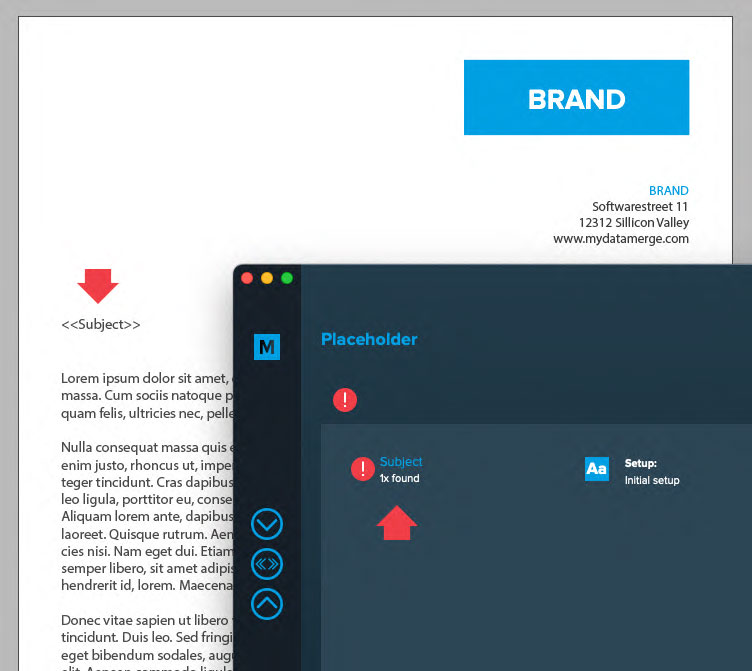
In the below image you can see the setup to output “Dear [First Name]”, a static text for “Dear ” [1] and a dynamic datasource element for the first name [2]. The output can be checked in the preview [3]: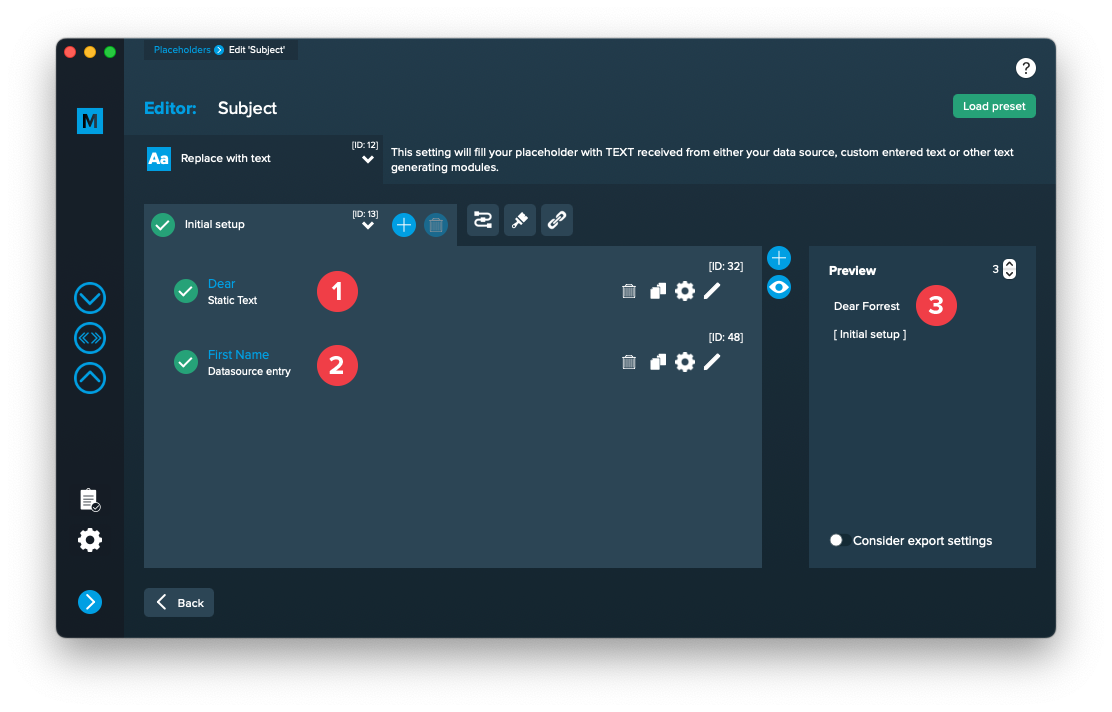
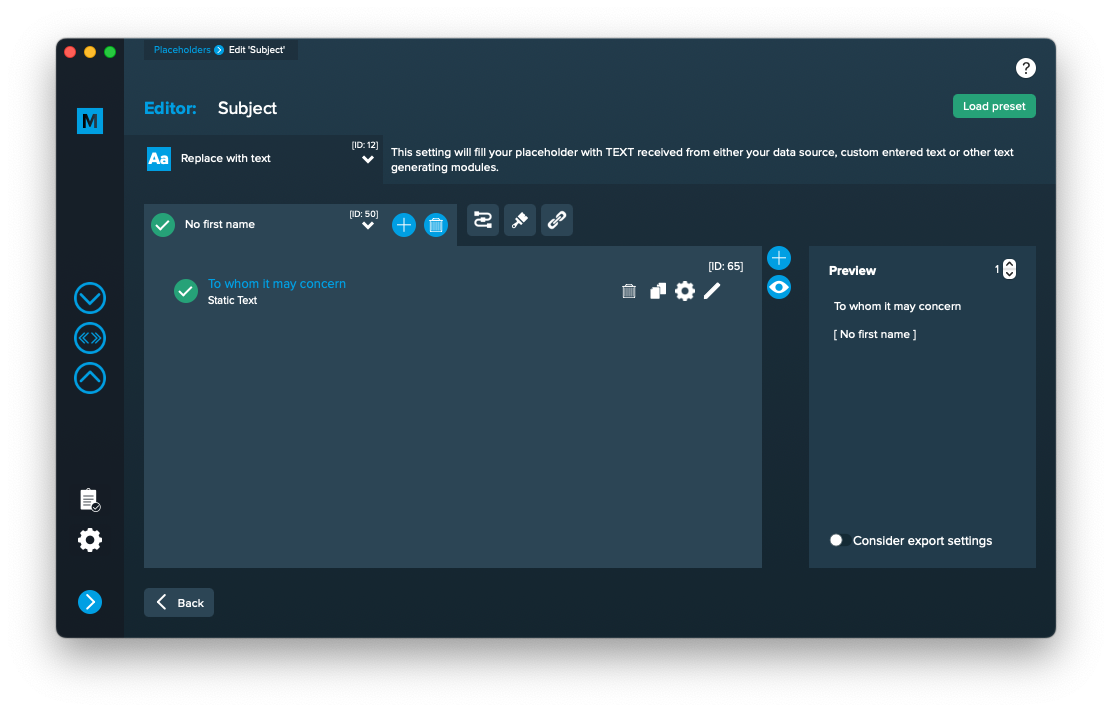
Now imagine you don’t have a first name, then you’d like to output “To whom it may concern” which you can do with a second setup. So we add another setup here and give it an appropriate name [1]:

Then we configure it to output the static text “To whom it may concern”.
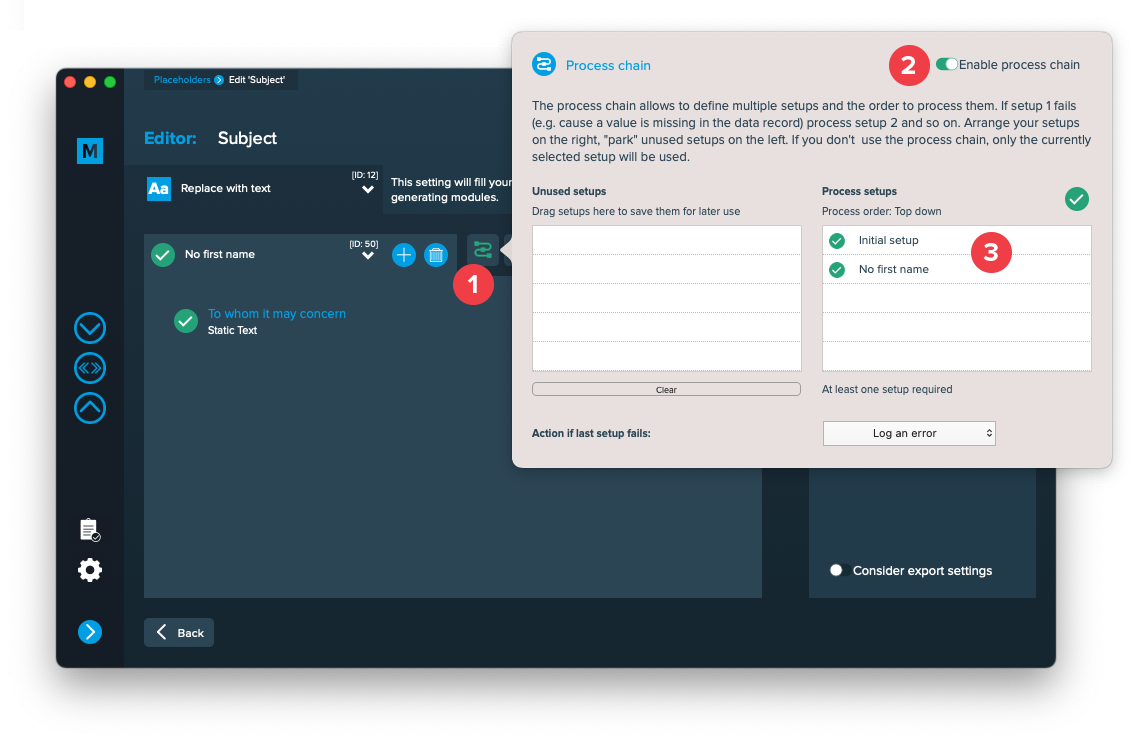
Right now, MyDataMerge would output “To whom it may concern” for every data record, because it’s the currently selected setup. To allow multiple setups to be processed you need to enable the process chain [1 + 2] as shown in the image below. Then all setups in the right table [3] will be processed from top down. If first setup fails (e.g. because first name is missing) then use second one and so on.
You can move unused setups to the left table, they will have no effect there. If the last setup in the right table fails, the “Action if last setup fails” will be executed which you can select at the bottom.
Note: You can add more control by adding conditions (on when it should be executed) to each setup.
3 Export
Filetypes
Export to PDF files
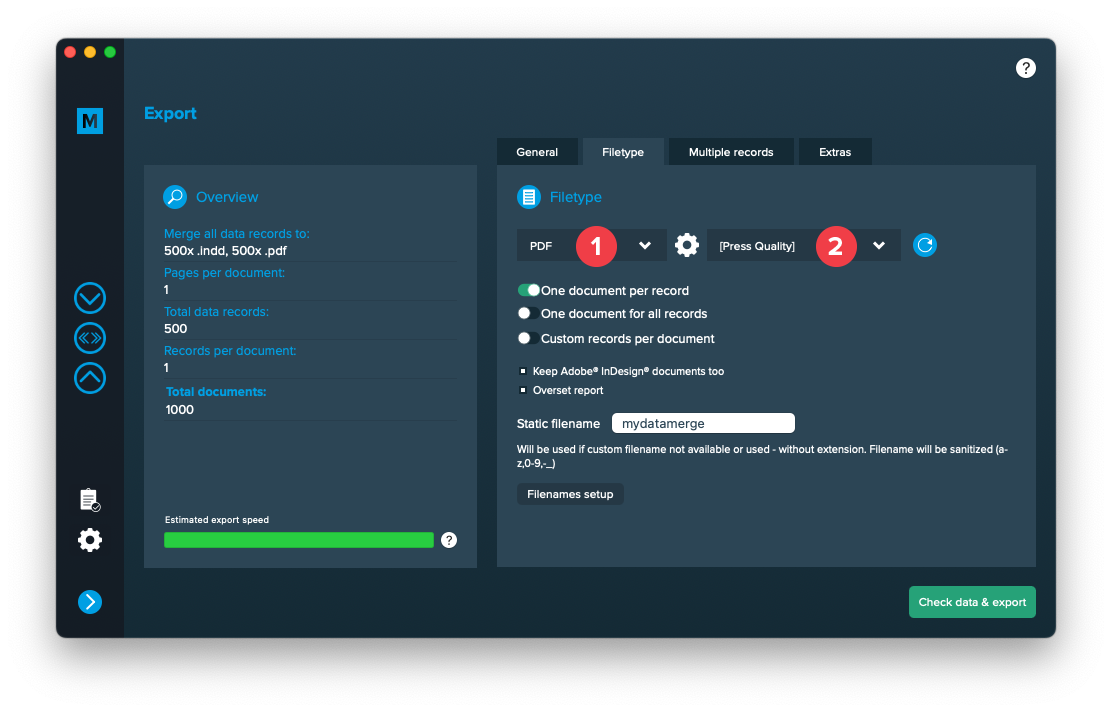
If you want to export to PDF files go to export > filetype and select the preferred filetype from the dropdown [1]. Note that you have to select a PDF preset [2]. They are directly imported form Adobe InDesign and can be updated with the circled arrow icon.
Use a static filename with counting number
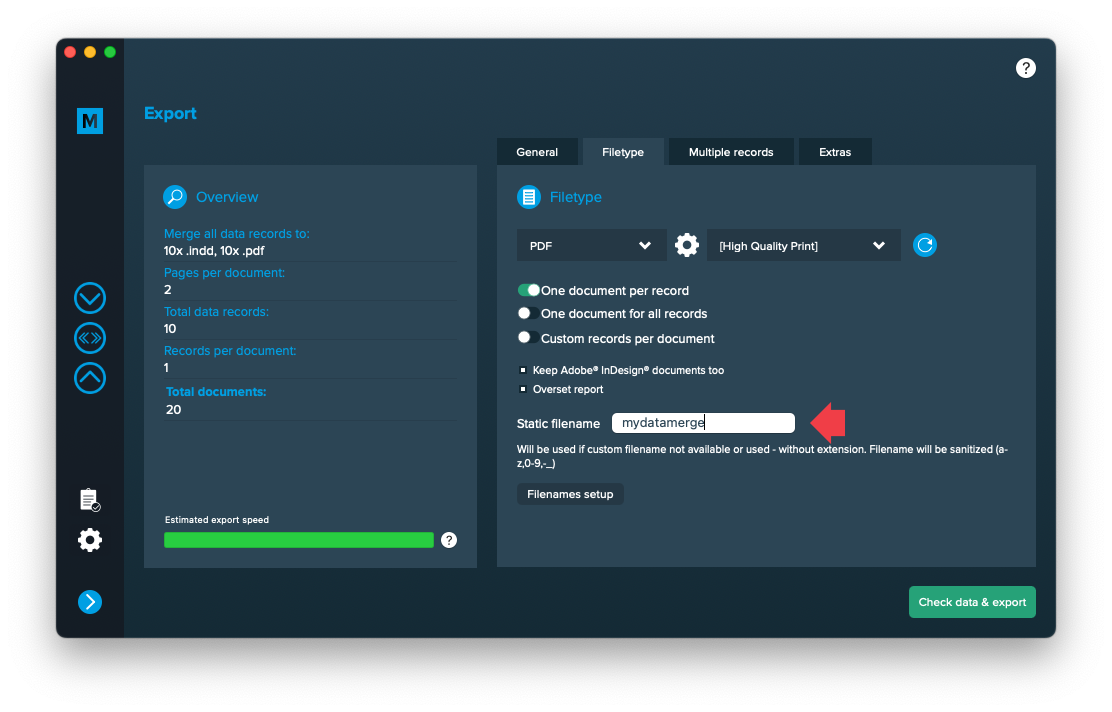
You can set a static filename in Export > Filetype > “Static filename” field.
With static filenames, every file will get the same name and a counting number will be attached. For example if you define static filename to be “mydatamerge” then files will be named like this:
- mydatamerge_1
- mydatamerge_2
- mydatamerge_3
- and so on
Please note that static filenames only allow a-z, 0-9, – and _ characters. Other characters will be removed or replaced.
Multiple records
Cut and stack assistance
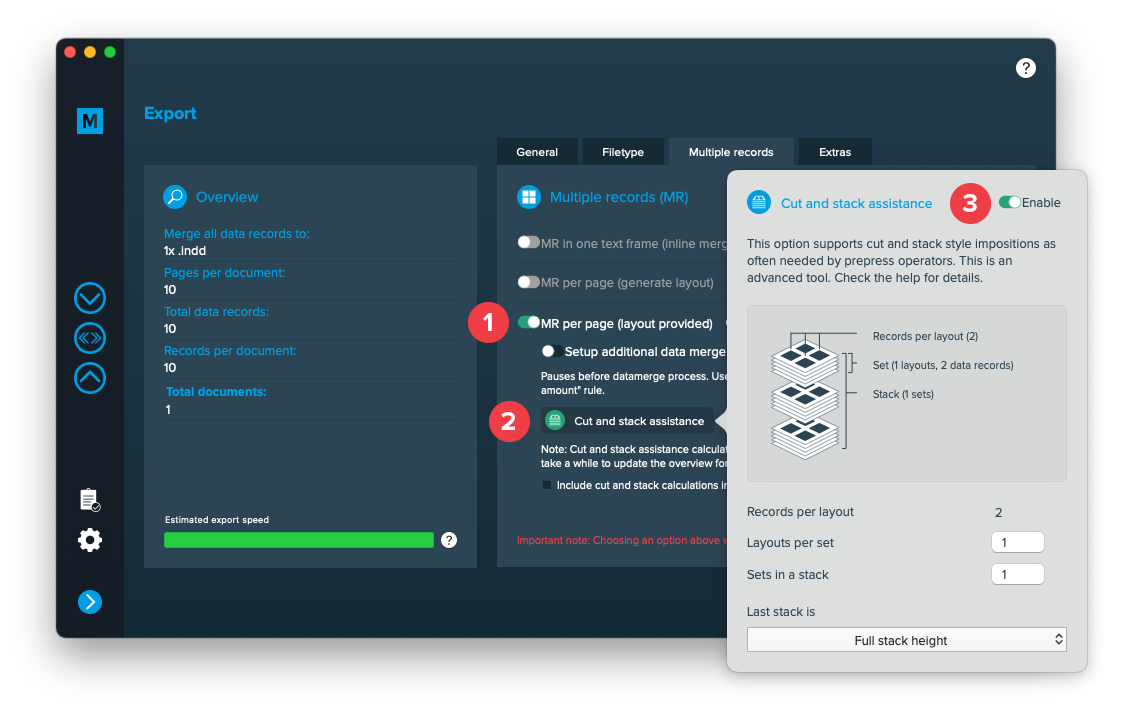
Cut and stack assistance is an advanced sorting algorithm, especially for pre-print operators. It becomes available if you have selected “Multiple records per page (layout provided)” [1]. Then click the button [2] and enable the assistance [3]:
Understanding cut and stack assistance
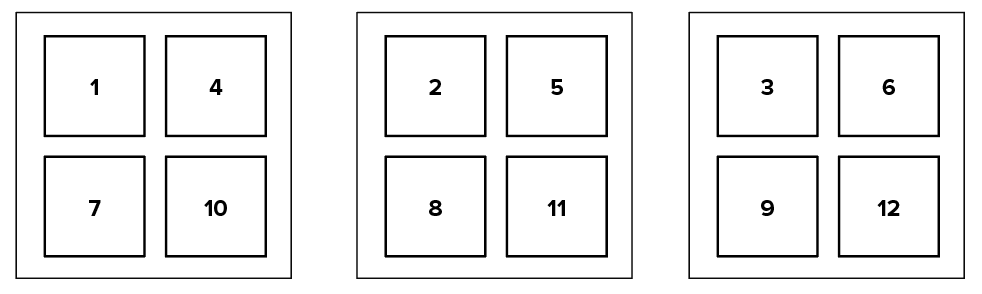
By default (without cut and stack assistance) multiple records are merged continuously in the order you arranged the copies on a sheet:

With cut and stack style impositions you can configure how records are sorted for cutting:
To make it more clear let’s have a look at the sheets when they are placed on top of each other:
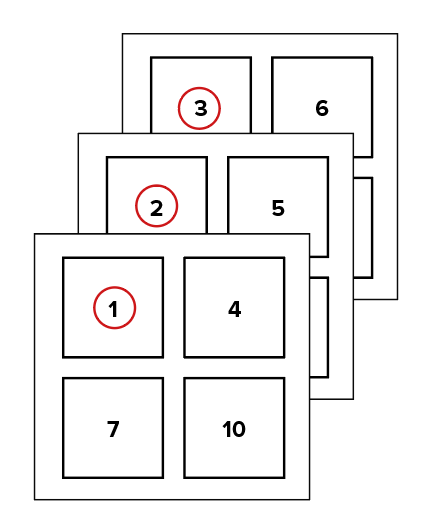
All sequencial records are below each other so that after cutting the sheets, the printer receives 4 stacks with all records in the right order. Once enabled you can apply a few settings:
- The number of layouts per set
- The number of sets in a (paper-) stack
- How to handle the last stack
“Last stack is” option
When the total size of database records don’t divide into equal size stacks, the size of the last stack can be calculated in one of the following ways.
Given a database with 200 records and the following settings:
- Records per layout: 3
- Layouts per set: 10
- Sets in a stack: 5
The following Excel will explain the behaviour to you. The blue represents the first stack, green the last stack.
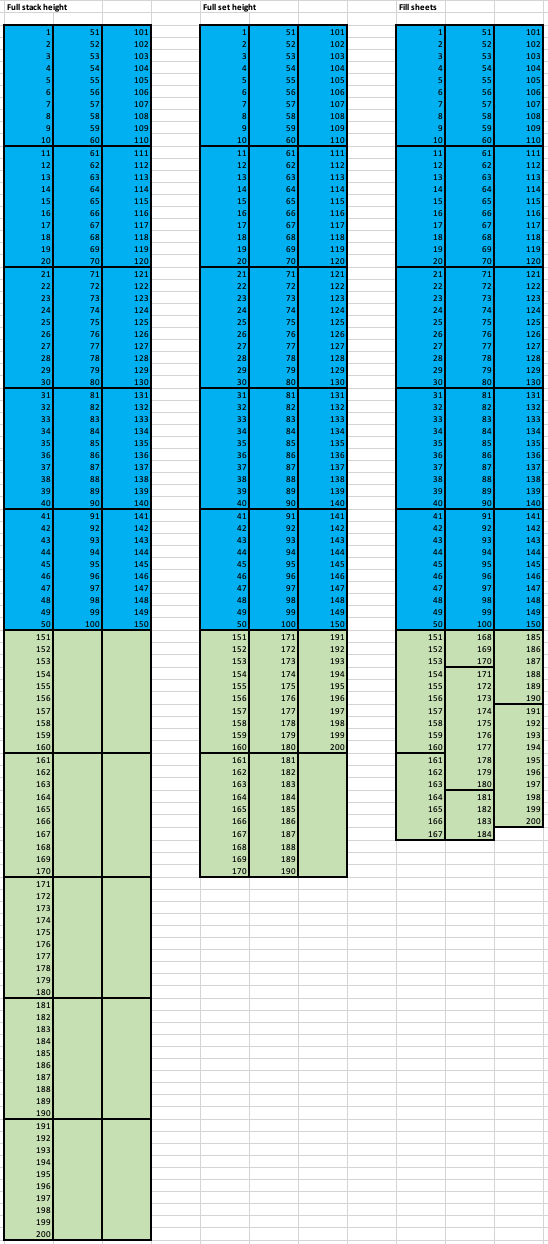
Full stack height (First example):
The last stack will be forced to the full stack height (equal to the other stacks), so records below each other are filled up until the stack height is reached. This will lead to equal height stacks but increases paper usage as parts of the sheets might stay empty.
Full set height (Second example):
The sets of the last stack will be filled with records so that sets are filled up, even if the stack doesn’t reach the same height than the other stacks. It still has some waste of paper but if the printer e. g. uses backing sheets they will be in the right place.
Optimize sheets (Third example):
This will optimize paper usage but is not recommended if e. g. backing sheets are used as they will not be at the right place.
Extras
Setup GREP replacements
GREP text actions allow you to search and replace specific strings matching custom search patterns with other strings or patterns AFTER the merge process is completed. They are applied to all documents generated.
Go to Export > Extras > GREP text
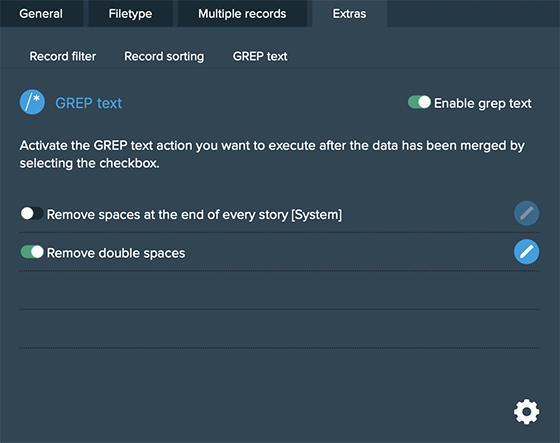
Here you can activate or deactivate your configured GREP text replacements. To edit them click on the pen icon of each row, to add new ones click on the gear icon in the bottom right. This will take you to the preferences where you can add new actions or delete existing ones (Note: Predefined actions cannot be deleted. They are flagged with [System] at the end of the name):
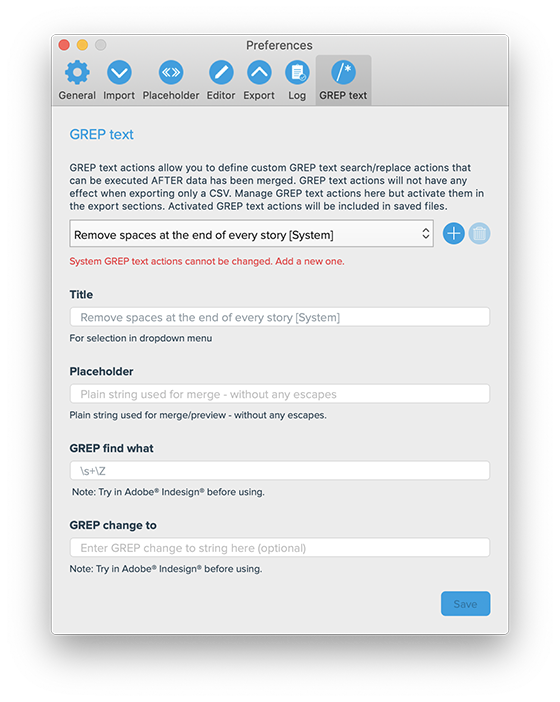
GREP text actions are stored locally on your machine. Only activated actions will be added to project files.