1 Datasource preparation & import
Best practices for your datasource
- Avoid „combining cells“ – each data content has to be in its own data cell. Otherwise this WILL cause unintended behaviour
- Format cells as text
- If you like to use MyDataMerge’s number formatting, format the cells as „number“ – other formats may cause unintended behaviour
- Colors, font size and other styling information will not be imported
- Formulas and other logic operations will not be imported – just the text content
- Line breaks will be imported/replaced as space character by default (you can change this in the import preferences)
Import datasource
To import Excel files, Microsoft Excel is required!
If you didn’t start it before running MyDataMerge, you will be presented this screen:
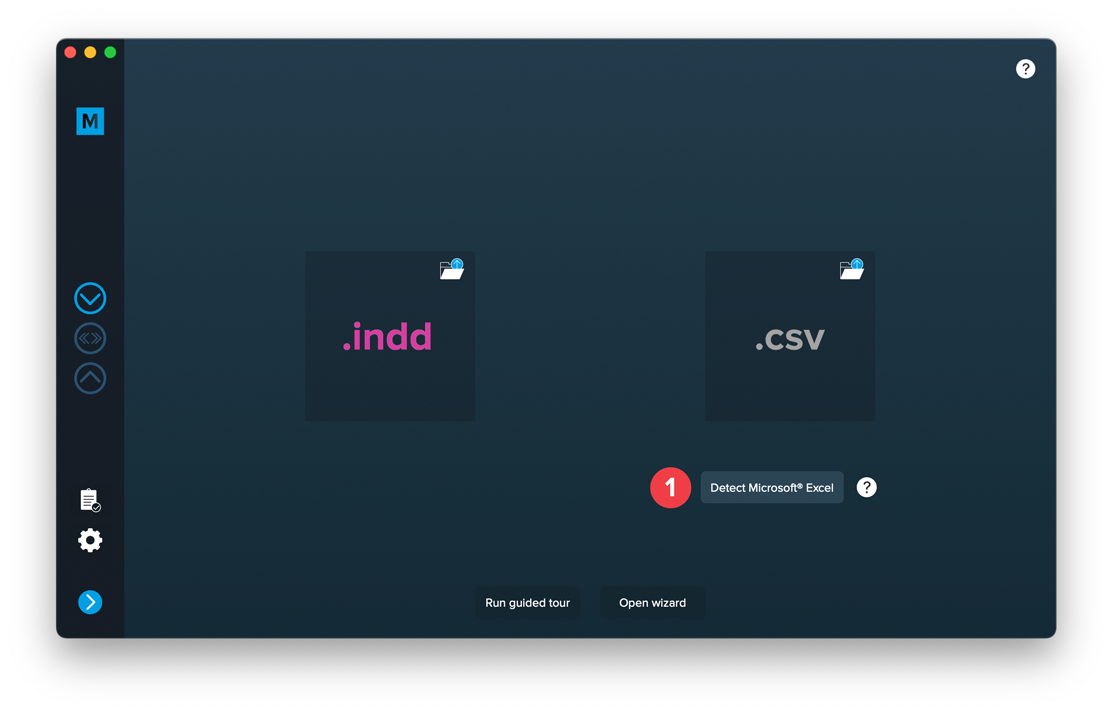
Click the “Detect Microsoft Excel” button to start the detection of Microsoft Excel. Once detected (or if you started it before running MyDataMerge) you will see this screen:
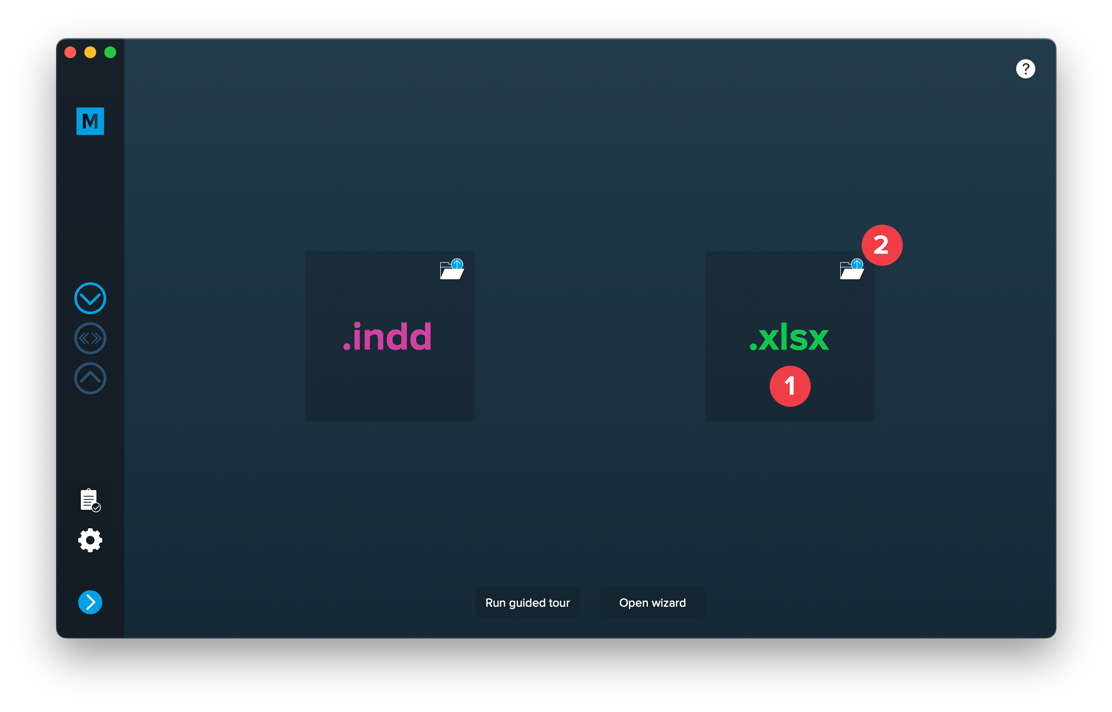
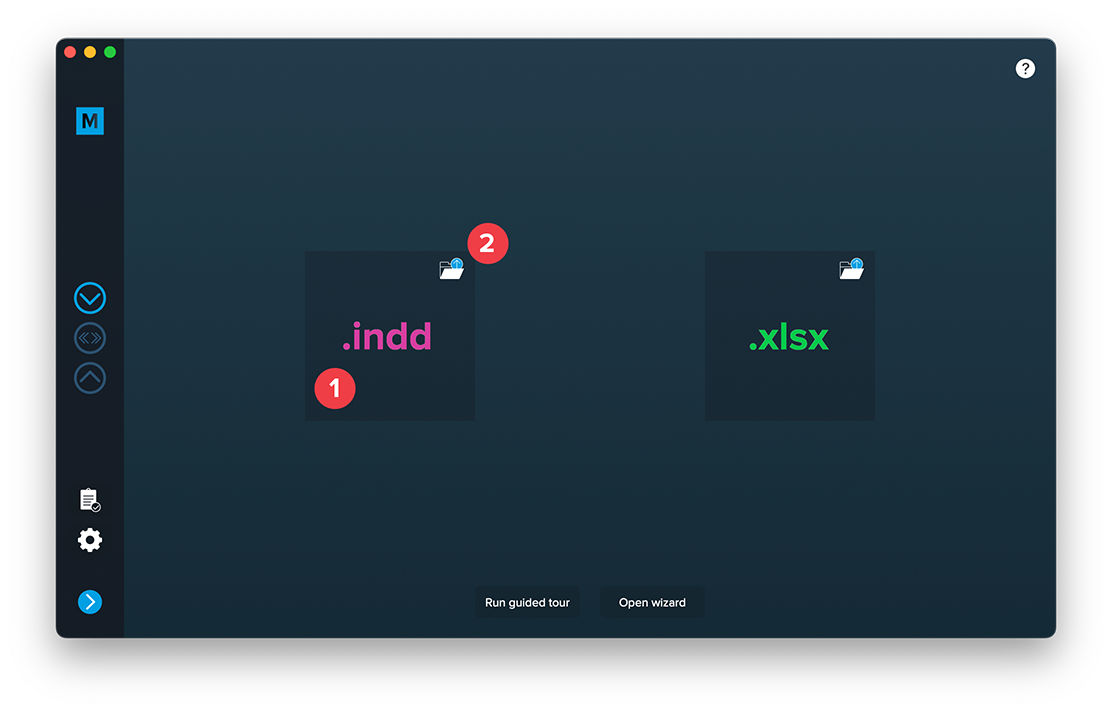
Drop your .xlsx file (note: .xls are not supported!) on the excel area [1] or load the file by clicking the folder button [2]. This will open the settings:
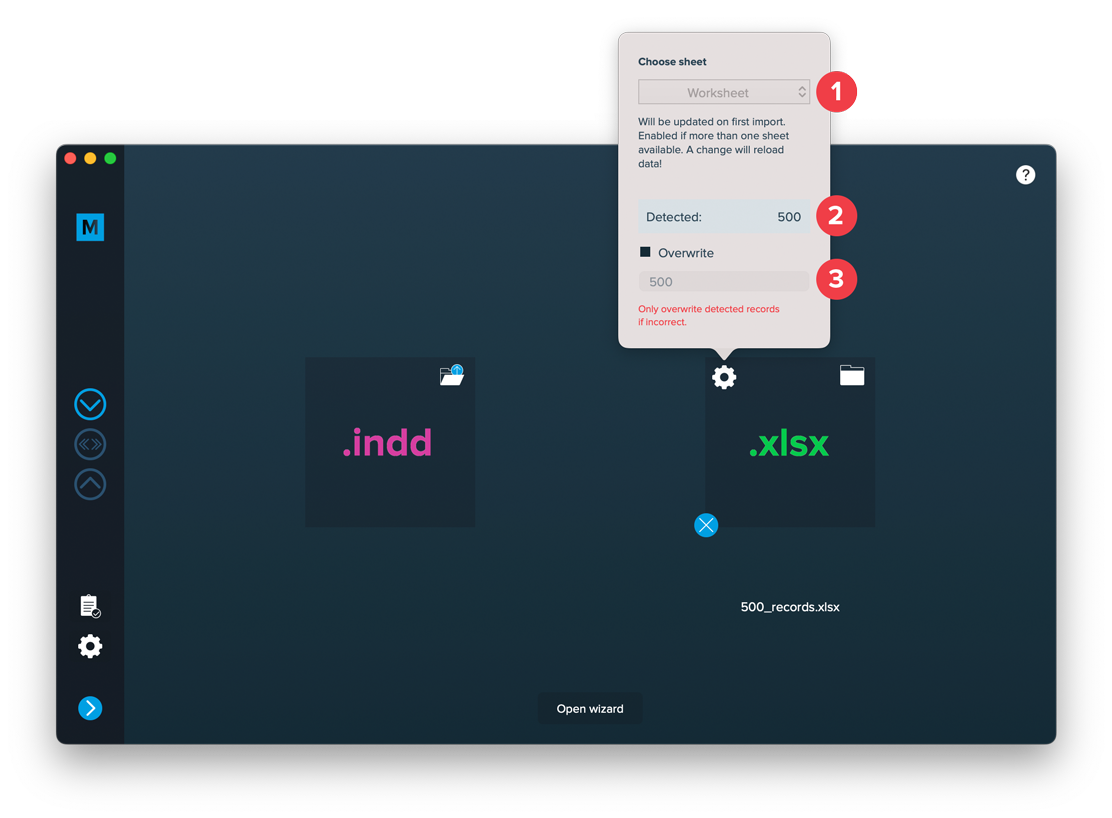
Here you can select the worksheet from which to import the data from [1]. MyDataMerge tries to detect the amount of records by scanning the file. Sometimes – even if cells look empty – they might contain space characters which causes the resulting amount of records [2] to be incorrect. Then (and only then) you can overwrite the total amount of records to import [3]. Note: The first row (with column labels) is NOT taken into account so record 1 starts in Excels row 2.
Once done, add a layout file, then you can import both files.
2 Layout preparation & import
Best practices for your layout
- Always expect long data. When preparing layouts for MyDataMerge, you have to add placeholders to text frames. Please make sure that text frames which contain placeholders are big enough to provide enough room for the data you want to merge in.
- Move unneeded stuff to master pages. Instead of keeping all items on the regular pages, move everything that’s does not need to be merged (like decoration, background images…) to the master page. For large databases, this will speed up the process a lot.
- Do not use styling options if every data record has the same styling. Apply styling in your layout document instead.
- Use locally installed fonts instead of auto downloading them from Adobe Cloud. Adobe Fonts can be installed locally as well in your Adobe Creative Cloud app. When loading them online, this can massively slow down the merge process or lead to errors.
- Scale images down. When merging thousands of data records its necessary to scale images down before the merge. No matter if the images are merged or part of the layout. This can save a lot of processing time.
Import
Import Layout
Importing your layout is easy:
Open MyDataMerge, start a new project and drag and drop your .indd file on the INDD area [1] or select the file by clicking the folder button [2]
After adding a datasource you can import both files.
Most common issues that may arise
- If you have missing links or fonts, MyDataMerge will throw an error and ask you to fix this
- If you have no placeholders defined (surrounded by << >>), MyDataMerge will throw an error
- If you have auto-download fonts from Adobe Cloud enabled, MyDataMerge will throw an error – this is because InDesign loads these fonts asynchronously and doesn’t let developers (like us) check the loaded state of these fonts. You can bypass this issue by activating the fonts directly in the cloud (so they are always active)
3 MyDataMerge configuration
Configurations
Add hyperlinks to setups
You can add Hyperlinks dynamically to your placeholders, no matter if its a text, image or QR-Code placeholder. After applying hyperlinks, a reader can click on the element to open the hyperlink.
Note: Hyperlinks will only work if you export to InDesign files or interactive PDF files.
How to add Hyperlinks
Hyperlinks are part of a setup – this gives you the full advantage of a setups flexibility (e.g. to apply different hyperlinks to the same placeholder based on conditions). To add a hyperlink, open the placeholder in the editor and click the hyperlink icon [1] to open the hyperlink panel. Then enable the hyperlink [2] and start with your configuration:
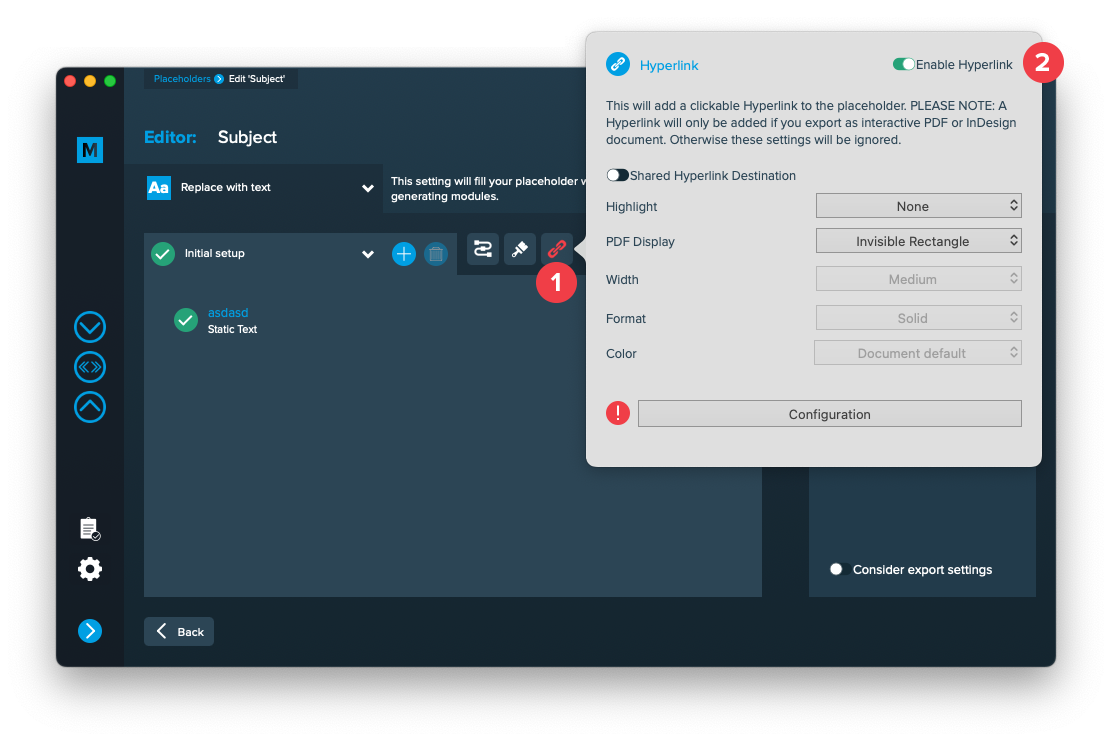
Shared Hyperlink destination
This is only useful if you have multiple hyperlinks with the same target and need to continue working with your InDesign layout. With this option turned on, only one hyperlink target will be created in your layout document and be shared for multiple hyperlinks. With this option turned off, a new target will be created for each hyperlink.
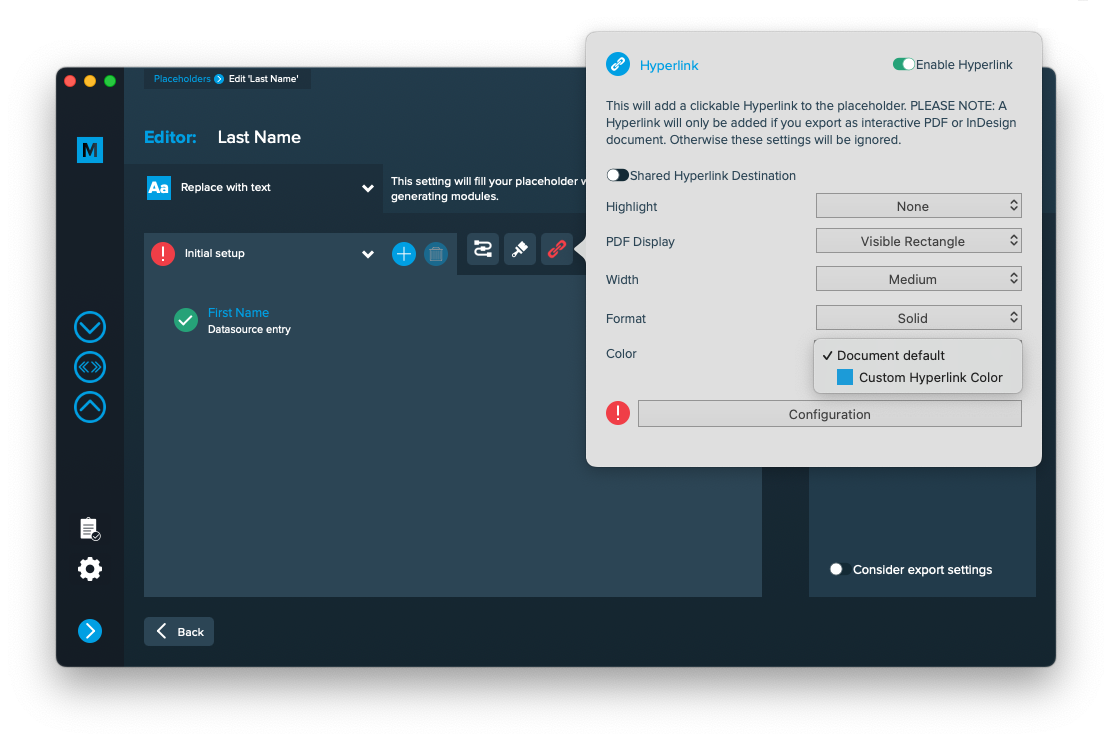
Highlight
Selects the highlight effect of the hyperlink
PDF Display
Selects the kind of frame around the hyperlink. Selecting “Visible Rectangle” will unlock the options below to further style the frame.
Width
The width of the rectangle (thin, medium or thick)
Format
The format of the rectangle (solid or dashed)
Color
The RGB color of the rectangle. All RGB swatches (and only RGB) from your document are imported automatically and will be selectable next to “Document default”.

Configuration
The configuration button opens another editor to configure the hyperlinks content. You can select a hyperlink type and edit every item like a text placeholder to inject data into a hyperlink.

4 Export
Filetypes
Export to Adobe InDesign® files
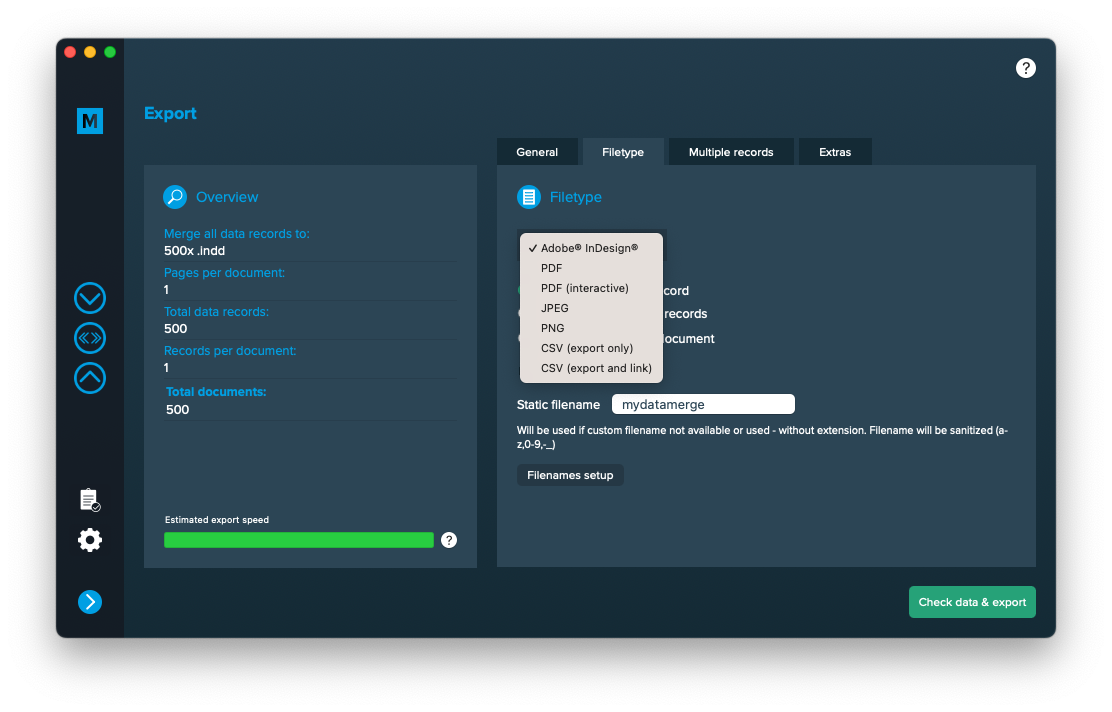
If you want to export to Adobe InDesign files go to export > filetype and select the preferred filetype from the dropdown.
Use a static filename with counting number
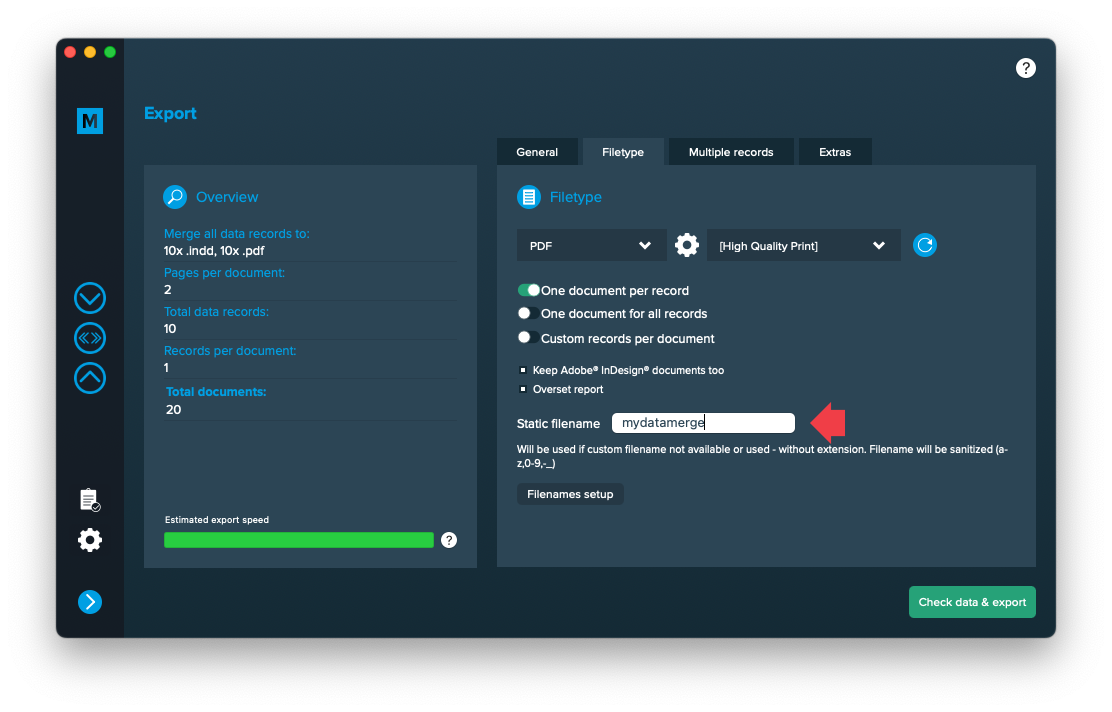
You can set a static filename in Export > Filetype > “Static filename” field.
With static filenames, every file will get the same name and a counting number will be attached. For example if you define static filename to be “mydatamerge” then files will be named like this:
- mydatamerge_1
- mydatamerge_2
- mydatamerge_3
- and so on
Please note that static filenames only allow a-z, 0-9, – and _ characters. Other characters will be removed or replaced.