1 Layout preparation & import
Prepare layout for Multiple records (generate layout)
Note: This feature uses InDesigns standard behaviour when handling multiple records per page. It still has limitations and some recorded bugs (on Adobe’s side). We recommend using multiple merge with existing layout.
When to use this mode
- You have a layout document with one page.
- You have elements on your page to be repeated automatically.
When not to use this mode
- If you need custom styling in the merge
- If you need hyperlinks
- If you like to use multiple setups
- If you like to use Automator actions
- If you like to use GREP text actions
- Basically … if you like to use any advanced feature of MyDataMerge
Prepare the layout
- Make sure you only have one page in your document, spreads turned off.
- Prepare your layout with every placeholder you need and move it to where you need it – leave enough room for the duplicates to be generated.
Note: Every element on the page will be duplicated – make sure to remove anything else from the page (put it on the master page for example).
2 MyDataMerge configuration
Configurations
Add hyperlinks to setups
You can add Hyperlinks dynamically to your placeholders, no matter if its a text, image or QR-Code placeholder. After applying hyperlinks, a reader can click on the element to open the hyperlink.
Note: Hyperlinks will only work if you export to InDesign files or interactive PDF files.
How to add Hyperlinks
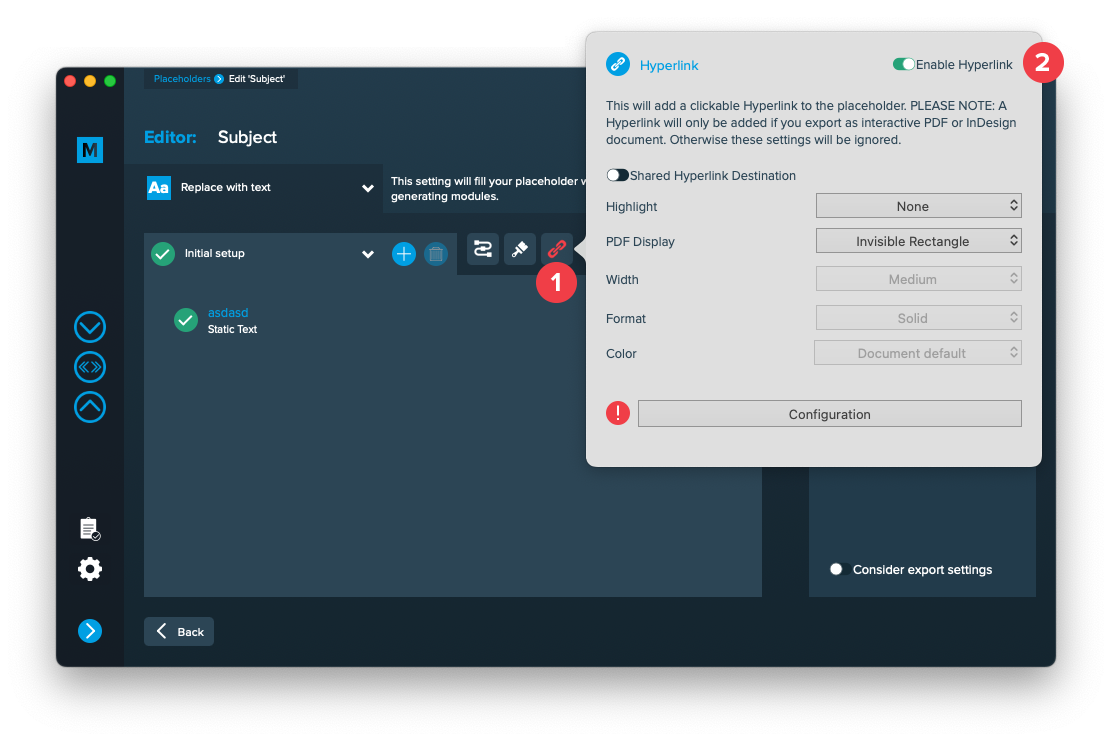
Hyperlinks are part of a setup – this gives you the full advantage of a setups flexibility (e.g. to apply different hyperlinks to the same placeholder based on conditions). To add a hyperlink, open the placeholder in the editor and click the hyperlink icon [1] to open the hyperlink panel. Then enable the hyperlink [2] and start with your configuration:
Shared Hyperlink destination
This is only useful if you have multiple hyperlinks with the same target and need to continue working with your InDesign layout. With this option turned on, only one hyperlink target will be created in your layout document and be shared for multiple hyperlinks. With this option turned off, a new target will be created for each hyperlink.
Highlight
Selects the highlight effect of the hyperlink
PDF Display
Selects the kind of frame around the hyperlink. Selecting “Visible Rectangle” will unlock the options below to further style the frame.
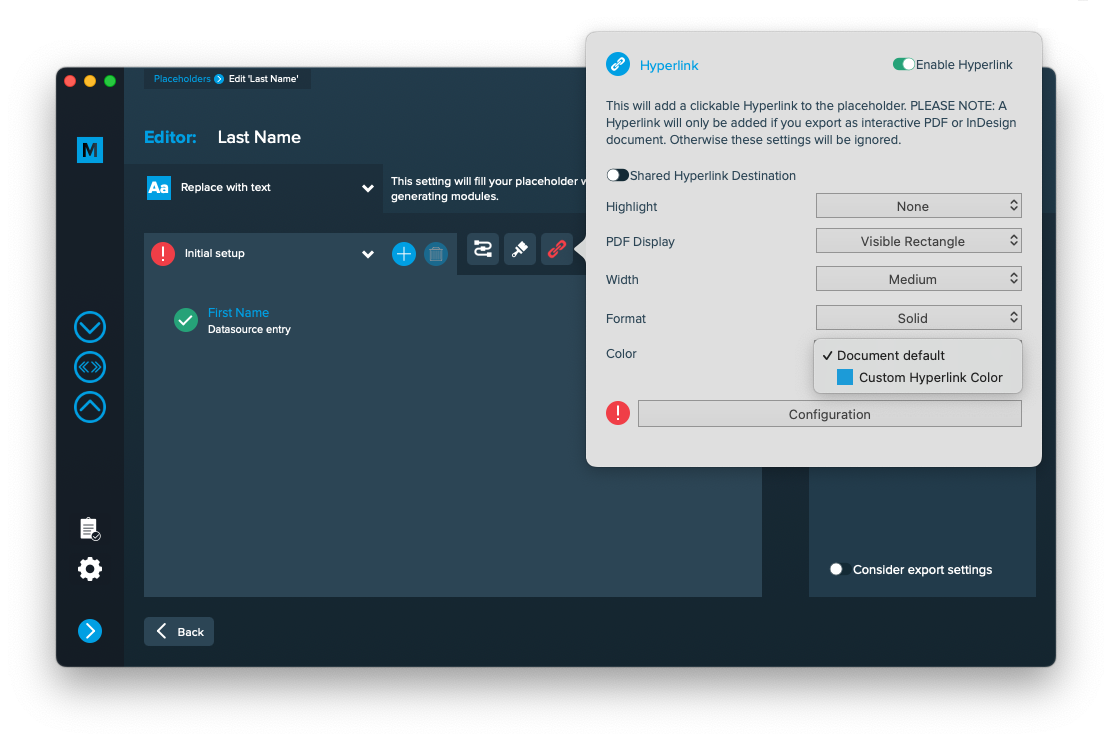
Width
The width of the rectangle (thin, medium or thick)
Format
The format of the rectangle (solid or dashed)
Color
The RGB color of the rectangle. All RGB swatches (and only RGB) from your document are imported automatically and will be selectable next to “Document default”.

Configuration
The configuration button opens another editor to configure the hyperlinks content. You can select a hyperlink type and edit every item like a text placeholder to inject data into a hyperlink.

3 Export
Filetypes
Export to Adobe InDesign® files
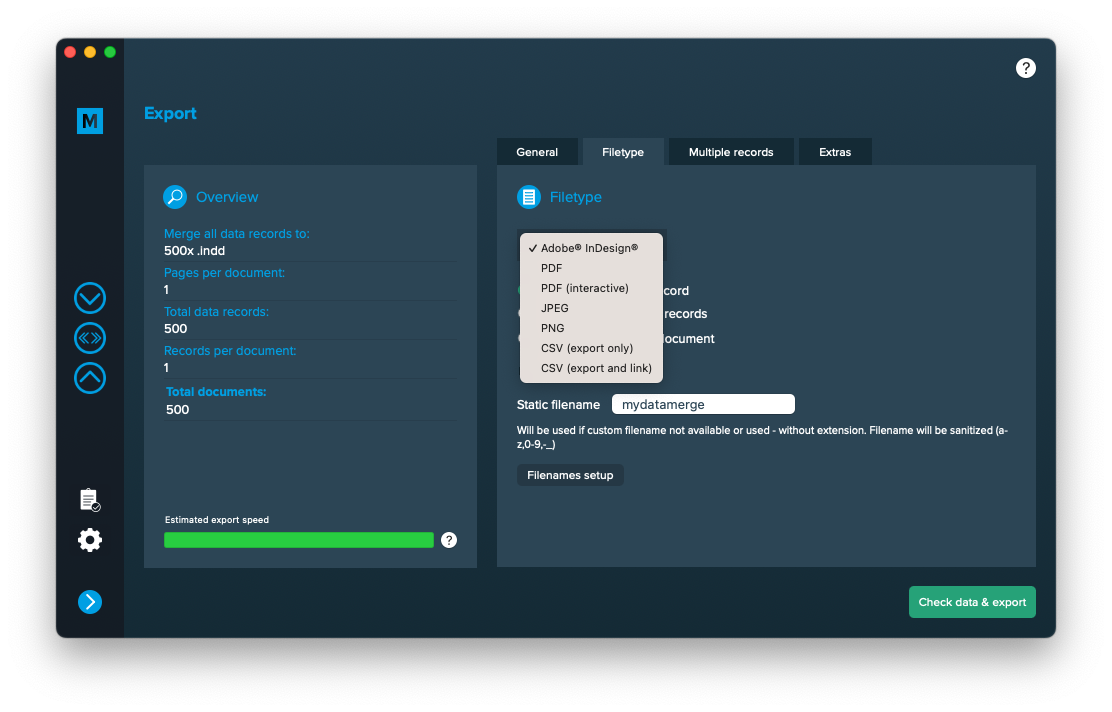
If you want to export to Adobe InDesign files go to export > filetype and select the preferred filetype from the dropdown.
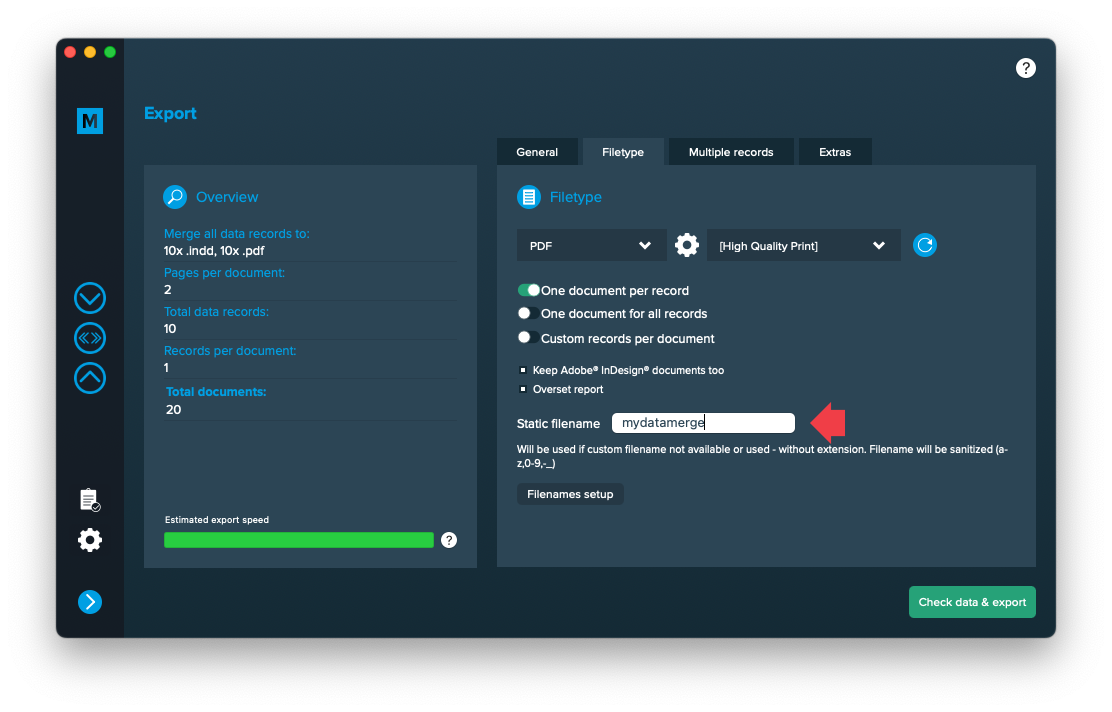
Use a static filename with counting number
You can set a static filename in Export > Filetype > “Static filename” field.
With static filenames, every file will get the same name and a counting number will be attached. For example if you define static filename to be “mydatamerge” then files will be named like this:
- mydatamerge_1
- mydatamerge_2
- mydatamerge_3
- and so on
Please note that static filenames only allow a-z, 0-9, – and _ characters. Other characters will be removed or replaced.
Multiple records
Multiple records (generate layout)
Go to Export > Multiple records and active “MR per page (generate layout)”. If you cannot select, please check again if your layout matches the requirements.

On the gear icon on the right, you can define the grid (direction and distances of where the duplicates should go to)
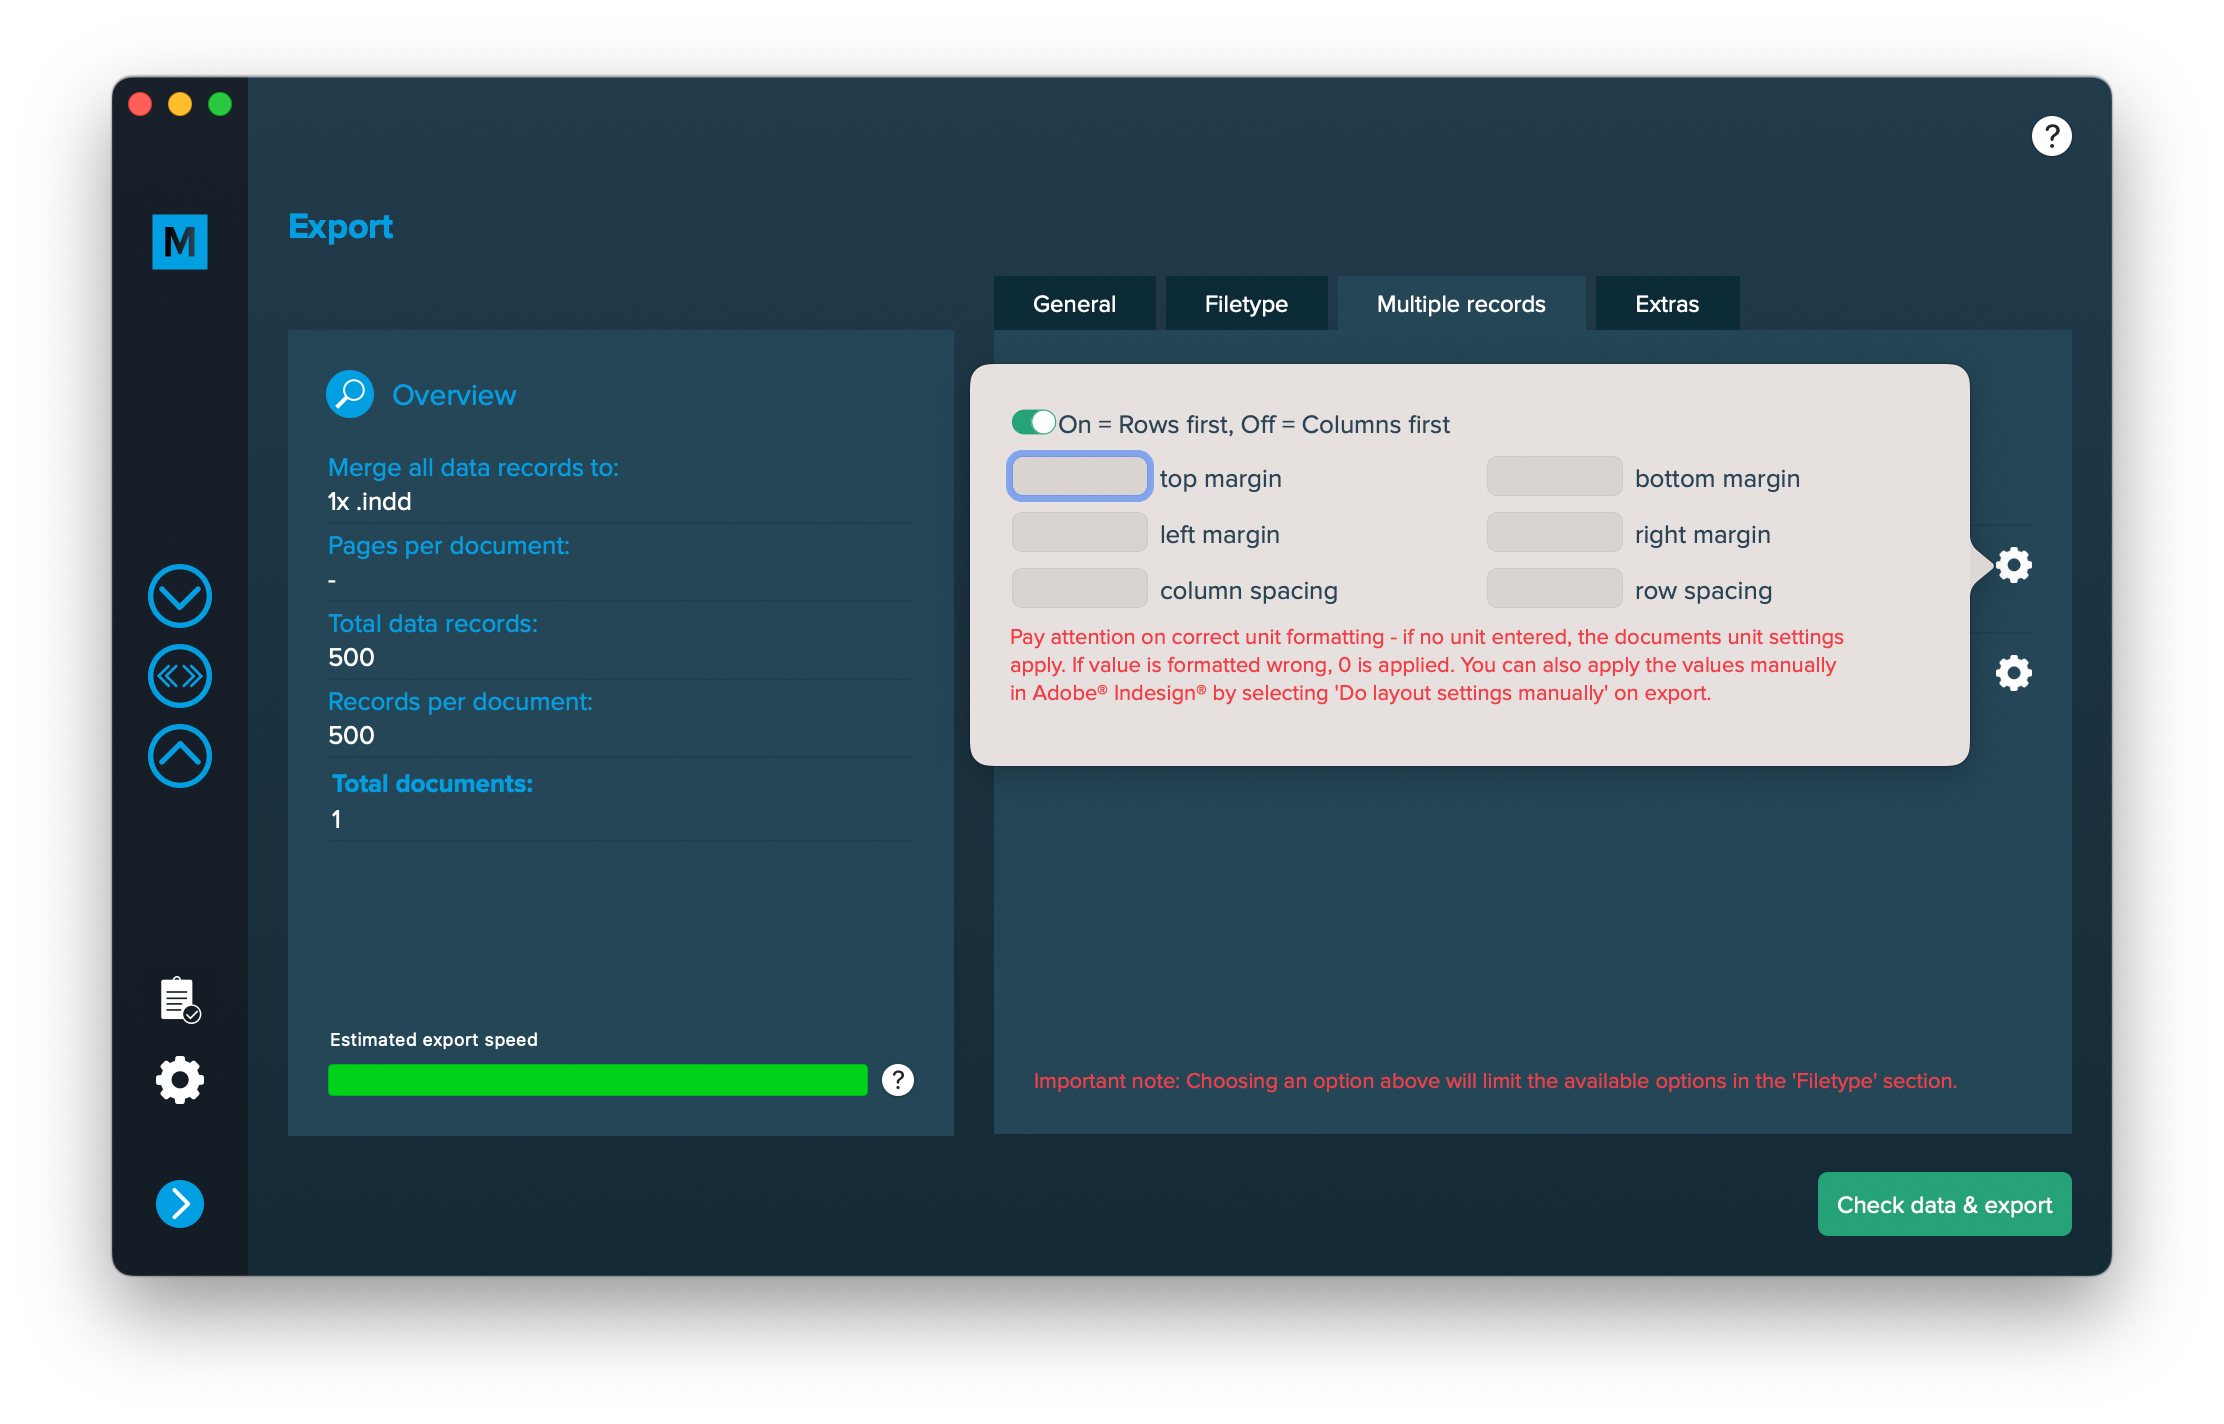
Note: Pay attention on correct unit formatting – if no unit entered, the documents unit settings apply. If value is formatted wrong, 0 is applied. You can also apply the values manually in Adobe® Indesign® by selecting ‘Do layout settings manually’ on export.