1 Layout preparation & import
Add placeholders to your layout
Add text placeholder
Requirements
- The placeholder text can be located in any text frame, along any other text
- You can choose any text you like (a-z, 0-9, _-)

Make sure that even the longest text from your datasource will have enough room in the text frame provided, or overset text will be produced.
Multiple records
Multiple records (prepared layout)
This is the most effective approach to apply multiple records to one layout (with one or more pages). To tell MyDataMerge where your records should go in the layout you need to create multiple groups of the same instance.
Example – Multiple business cards with front and rear side
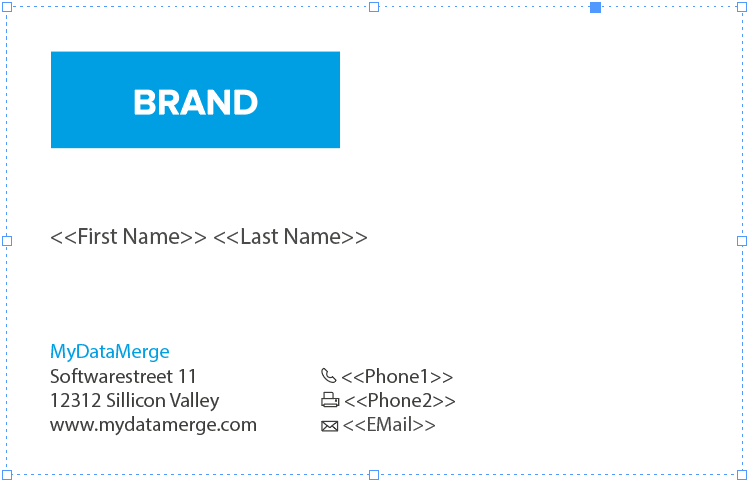
You have a business card that you want to have 8 times on a sheet including their rear sides. First of all, layout one business card with all placeholders you need and group it. By grouping it, MyDataMerge knows now that all the placeholders inside the group belong together.
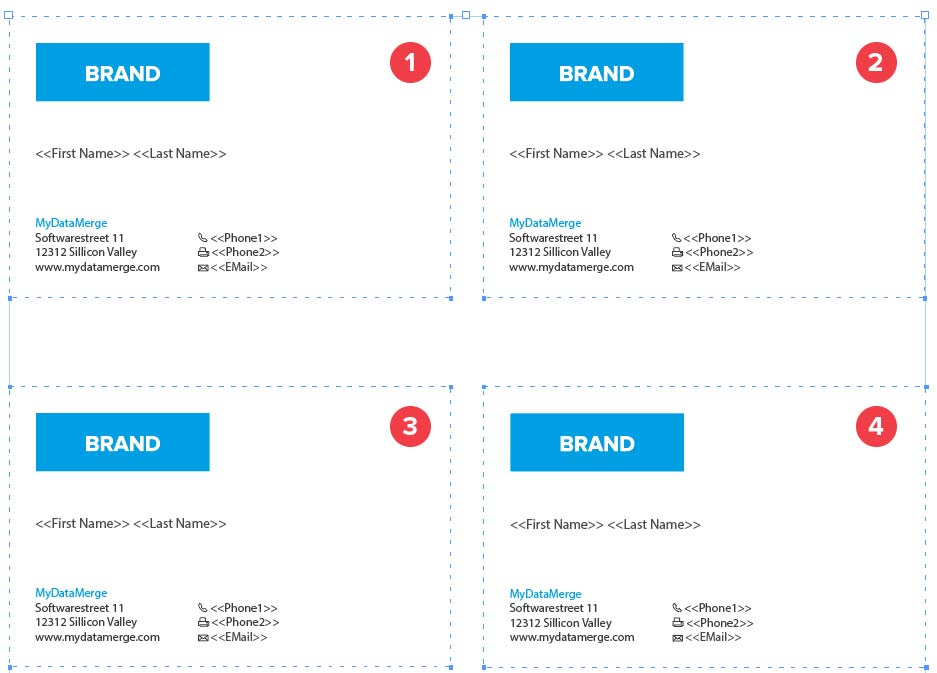
Next, duplicate (or copy/paste) the group to create another business card. Arrange it on your sheet in the order you want the data to be merged. This can be from left to right like in the below example [1 to 4] or right to left, or up to down …
Now on the next page you arrange groups of the rear sides of the business cards, but as the rear side is mirrored you need to start from right to left [1 to 4] with arranging groups:
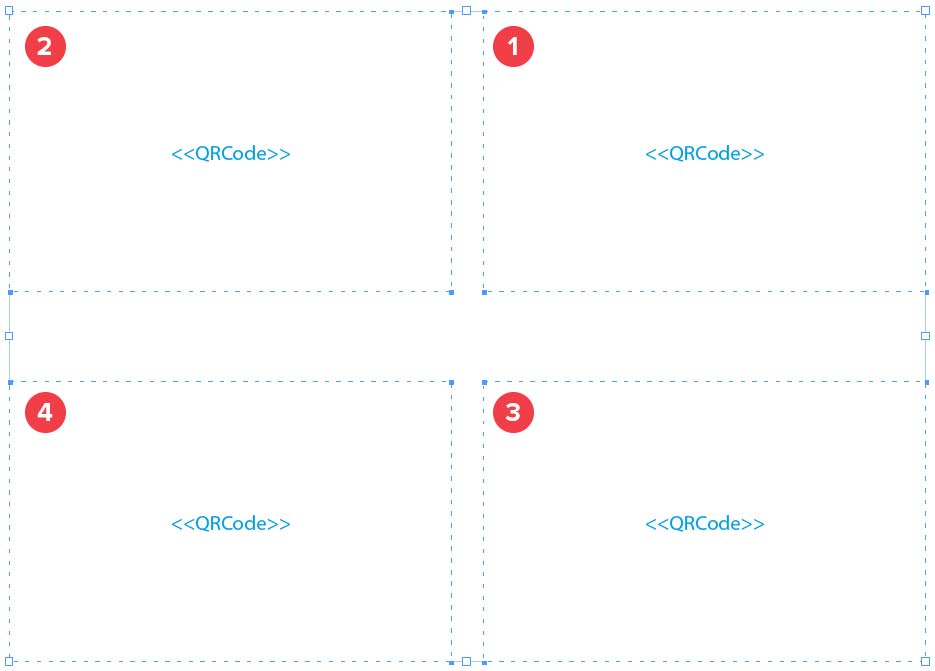
Remember: The groups tell MyDataMerge which placeholders belong together and the order you arrange the copies with represents the order the records are merged.
2 MyDataMerge configuration
Editing text placeholders
Setup text placeholders
A text placeholder will inject text from various sources into your layout in the merge process.
These sources can be one or a combination of:
- Datasource content (Changes for each record)
- Static text (Always the same)
- Sequence (Different types of counting numbers)
- Automator workflow (for editing outside of MyDataMerge – learn more here)
- Custom (java-)script (learn more here)
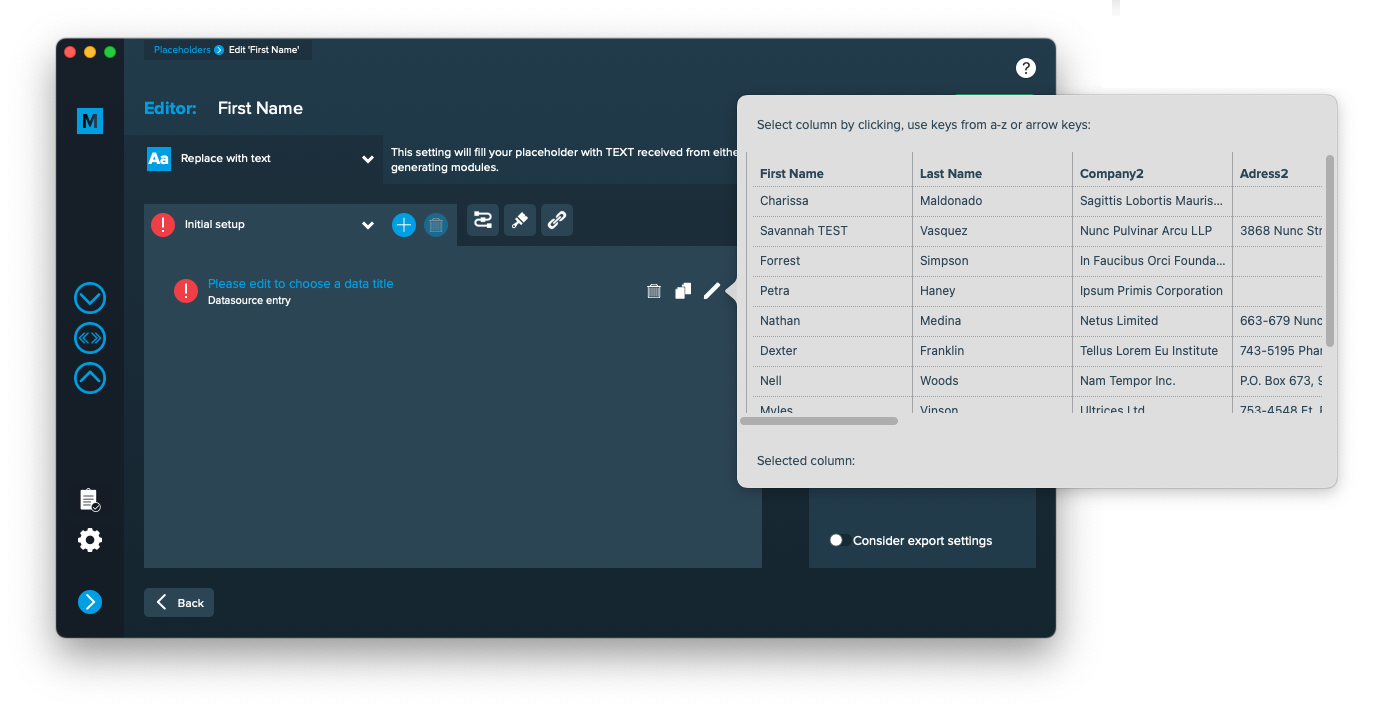
To add an element, open the placeholder by double clicking it (or click the pen icon), then add an element by clicking the plus icon:
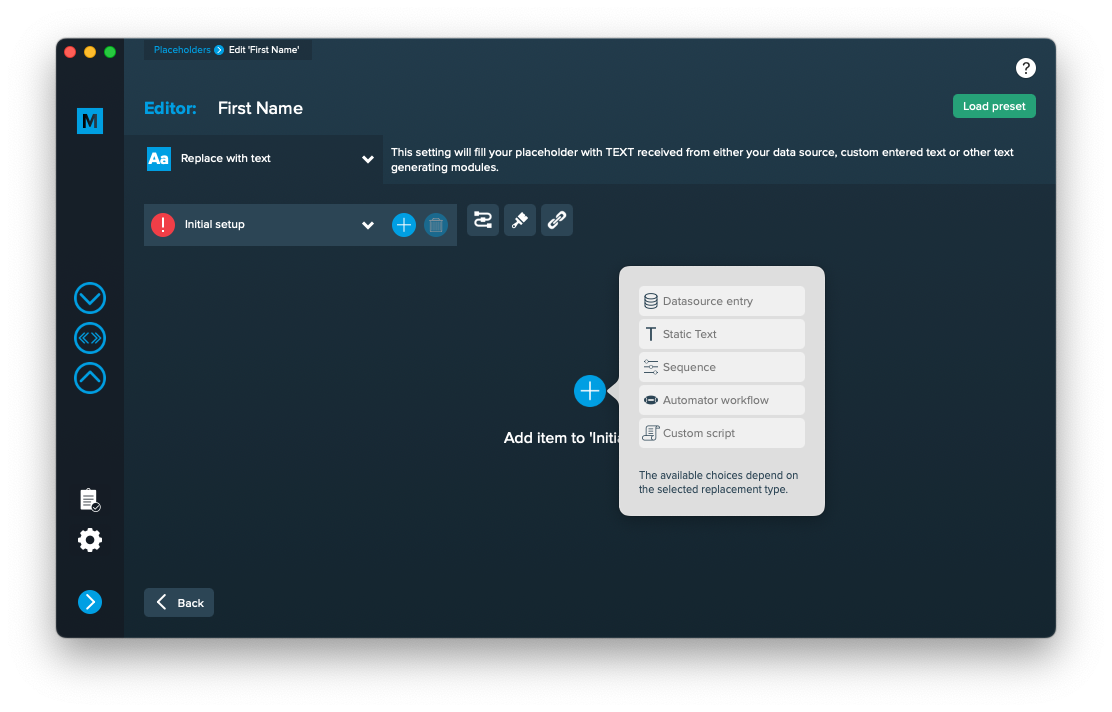
Add the element and the appropriate editor will open (e.g. datasource element):
 Once you selected or entered the required data, the element becomes valid (green check)
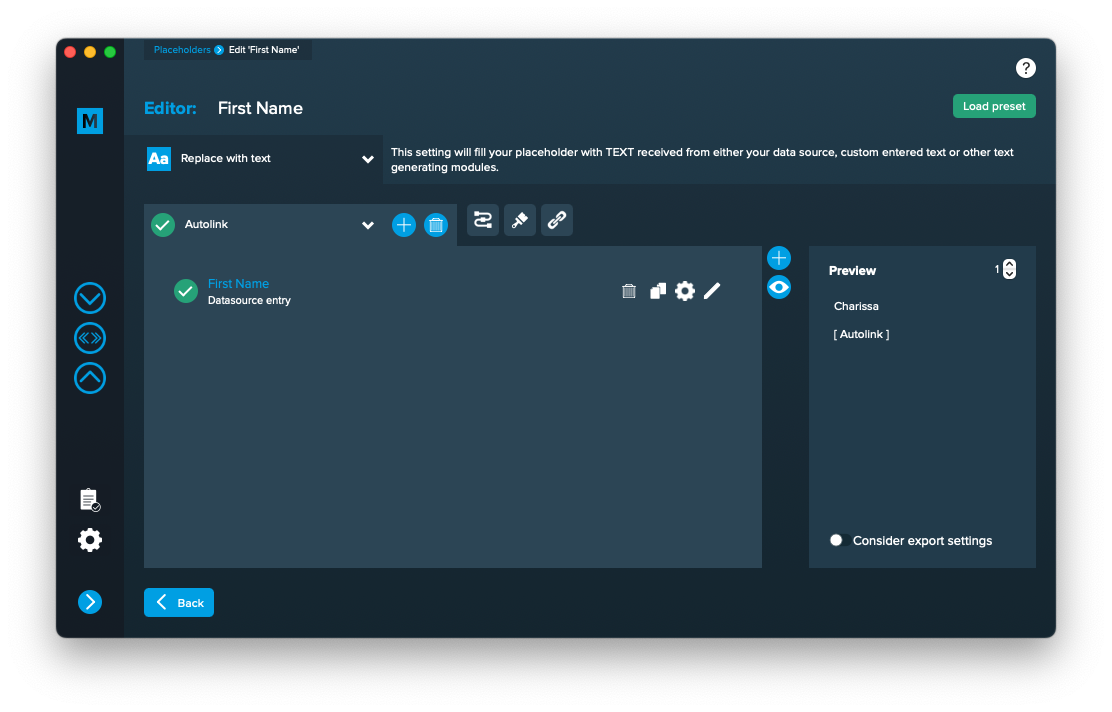
Once every placeholder is valid, you are able to export.
Notes:
- You can combine different elements here by adding them (plus icon above the eye icon) and drag & drop them up or down. The result will always be shown in the preview on the right.
- Additionally every element has some settings (gear icon) which will provide a wide range of tools to transform your data (e.g. strip whitespaces, add space before or after and so on)
3 Export
Filetypes
Export to JPEG files
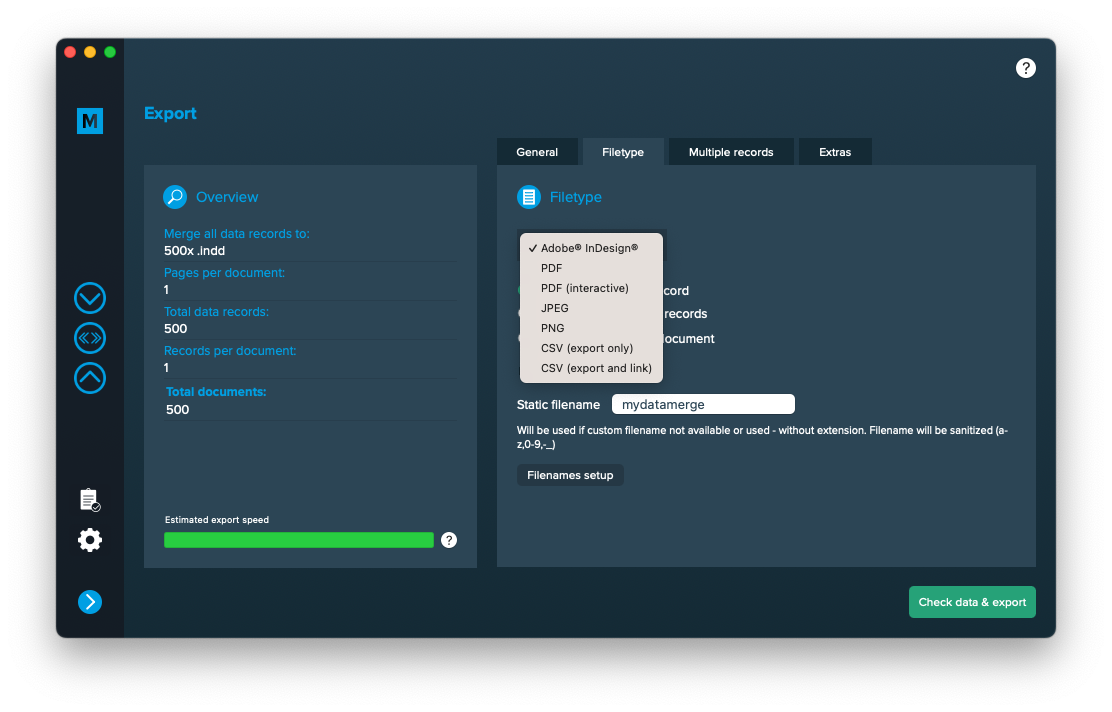
If you want to export to JPEG files go to export > filetype and select the preferred filetype from the dropdown.
Use a static filename with counting number
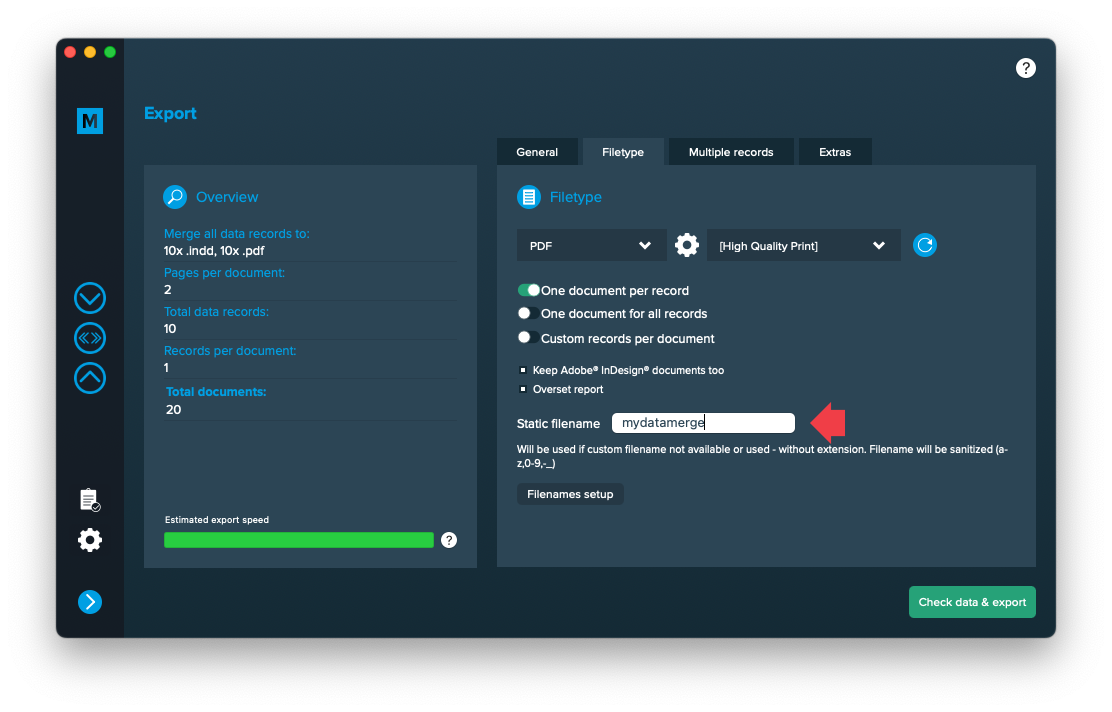
You can set a static filename in Export > Filetype > “Static filename” field.
With static filenames, every file will get the same name and a counting number will be attached. For example if you define static filename to be “mydatamerge” then files will be named like this:
- mydatamerge_1
- mydatamerge_2
- mydatamerge_3
- and so on
Please note that static filenames only allow a-z, 0-9, – and _ characters. Other characters will be removed or replaced.
Extras
Setup GREP replacements
GREP text actions allow you to search and replace specific strings matching custom search patterns with other strings or patterns AFTER the merge process is completed. They are applied to all documents generated.
Go to Export > Extras > GREP text
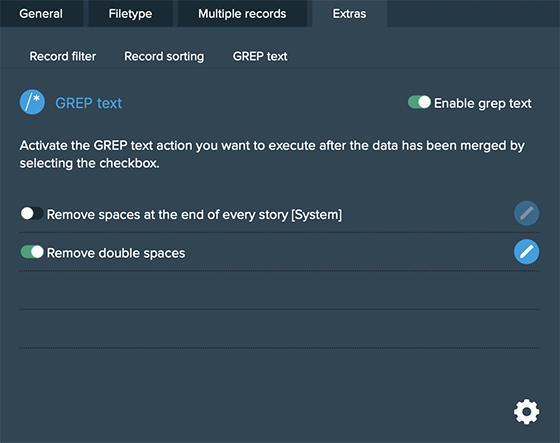
Here you can activate or deactivate your configured GREP text replacements. To edit them click on the pen icon of each row, to add new ones click on the gear icon in the bottom right. This will take you to the preferences where you can add new actions or delete existing ones (Note: Predefined actions cannot be deleted. They are flagged with [System] at the end of the name):
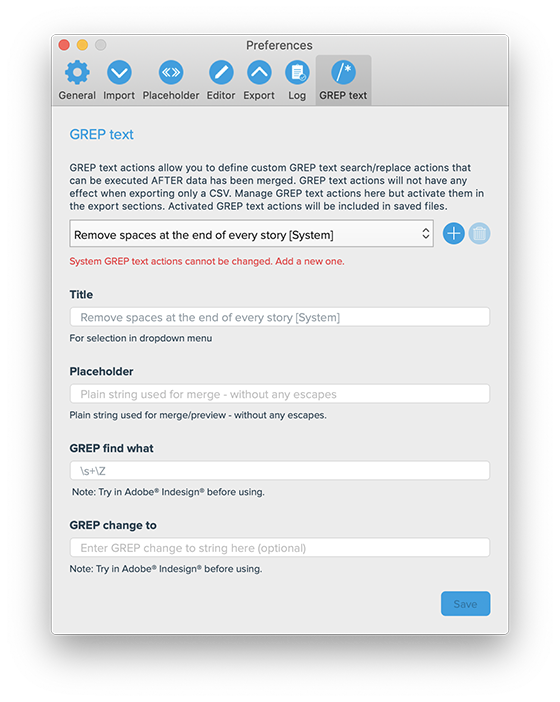
GREP text actions are stored locally on your machine. Only activated actions will be added to project files.