1 Layout preparation & import
Add placeholders to your layout
Add text placeholder
Requirements
- The placeholder text can be located in any text frame, along any other text
- You can choose any text you like (a-z, 0-9, _-)
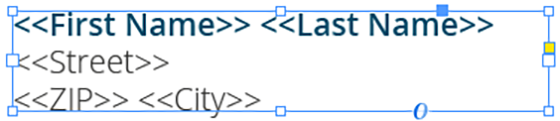
Make sure that even the longest text from your datasource will have enough room in the text frame provided, or overset text will be produced.
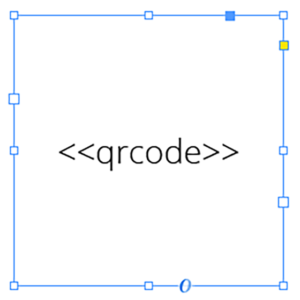
Add colored QR-Code placeholder
Requirements
- The placeholder text must be located in a single text frame (not linked with any other)
- The text frame must be a square (same height and width)
- The placeholder text including tags must be the only content of the text frame (be careful with spaces)
- You can choose any text you like (a-z, 0-9, _-)
- If you want to use Autolink you can add # to identify the placeholder as QR-Code, e.g. <<#qrcode>>
Coloring QR-Codes
To color your QR-Codes, you just need to apply a color to your text frame and the text. The text frame’s color will be the background color of the QR-Code, the text color will result in the QR-Codes color itself.
Best practice: Even if you don’t need a background color (e.g. cause it is white) you still should set a color. This speeds up the merge process.

2 MyDataMerge configuration
Editing text placeholders
Setup text placeholders
A text placeholder will inject text from various sources into your layout in the merge process.
These sources can be one or a combination of:
- Datasource content (Changes for each record)
- Static text (Always the same)
- Sequence (Different types of counting numbers)
- Automator workflow (for editing outside of MyDataMerge – learn more here)
- Custom (java-)script (learn more here)
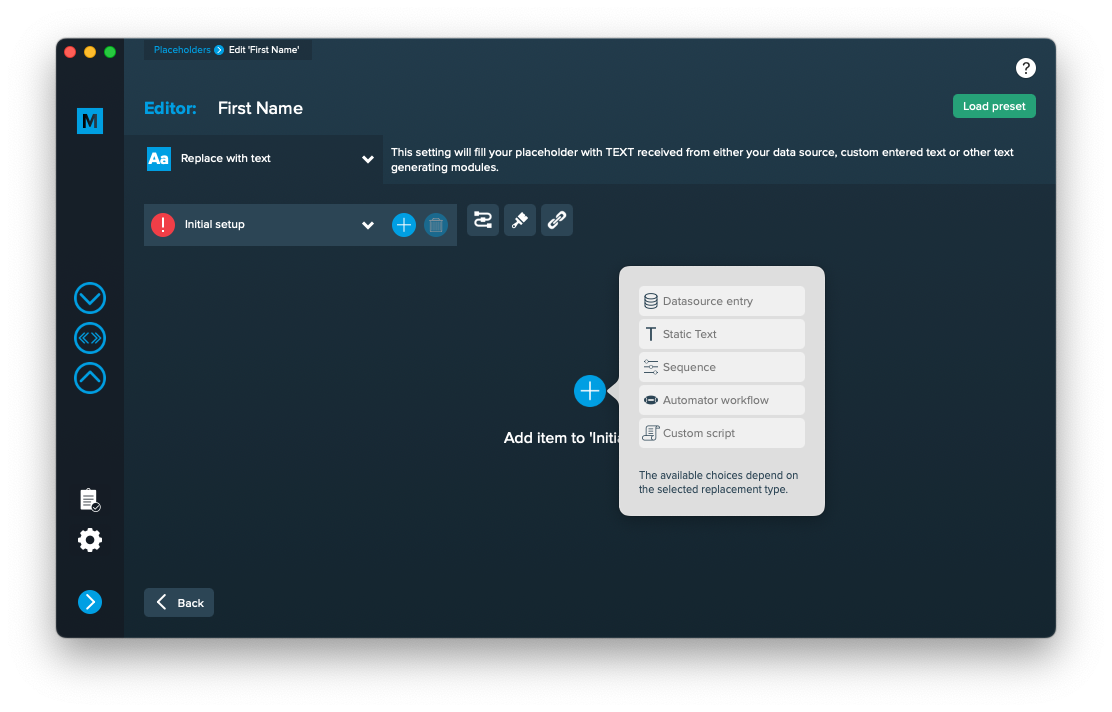
To add an element, open the placeholder by double clicking it (or click the pen icon), then add an element by clicking the plus icon:
Add the element and the appropriate editor will open (e.g. datasource element):
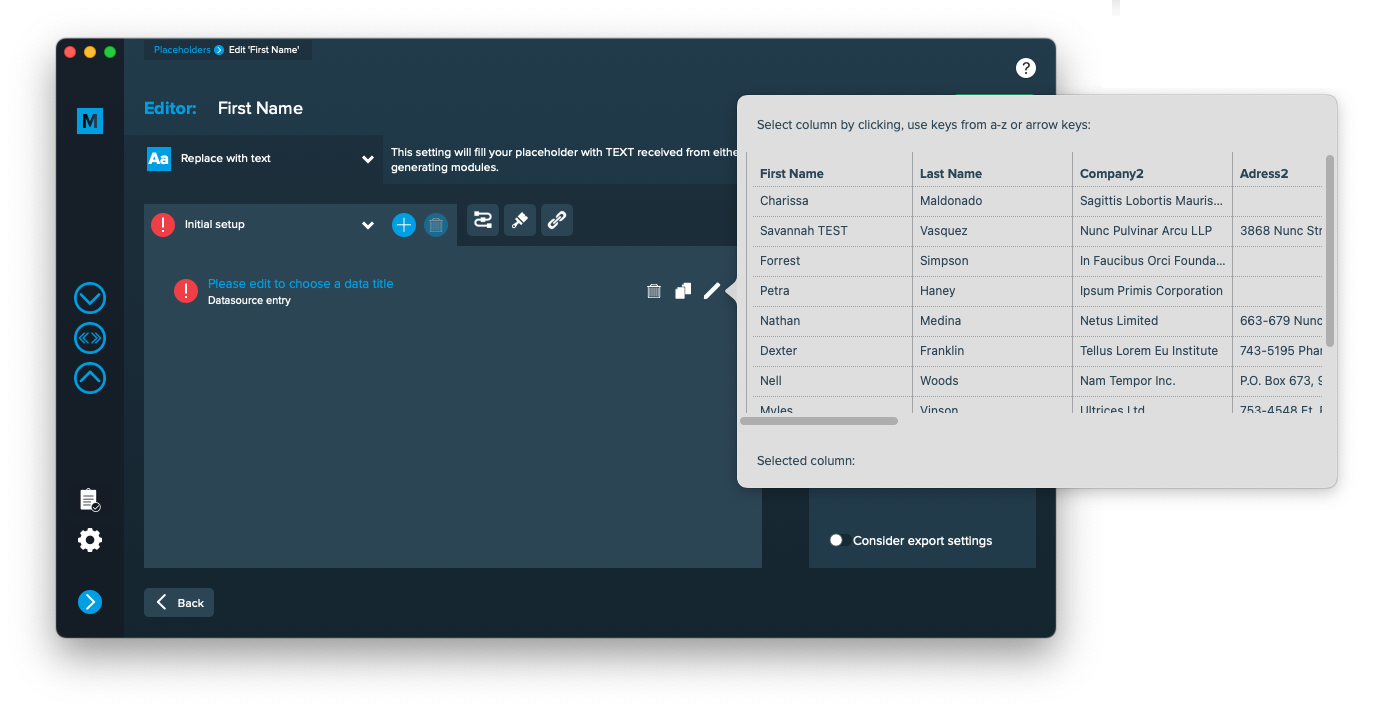 Once you selected or entered the required data, the element becomes valid (green check)

Once every placeholder is valid, you are able to export.
Notes:
- You can combine different elements here by adding them (plus icon above the eye icon) and drag & drop them up or down. The result will always be shown in the preview on the right.
- Additionally every element has some settings (gear icon) which will provide a wide range of tools to transform your data (e.g. strip whitespaces, add space before or after and so on)
Editing QR-Code placeholders
Setup QR-Code placeholders
A QR-Code placeholder will add a specific type of QR-Code (vCard, URL, Text) with content from various sources into your layout in the merge process.
These sources can be one or a combination of:
- Datasource content (Changes for each record)
- Static text (Always the same)
- Sequence (Different types of counting numbers)
- Automator workflow (for editing outside of MyDataMerge – learn more here)
- Custom (java-)script (learn more here)
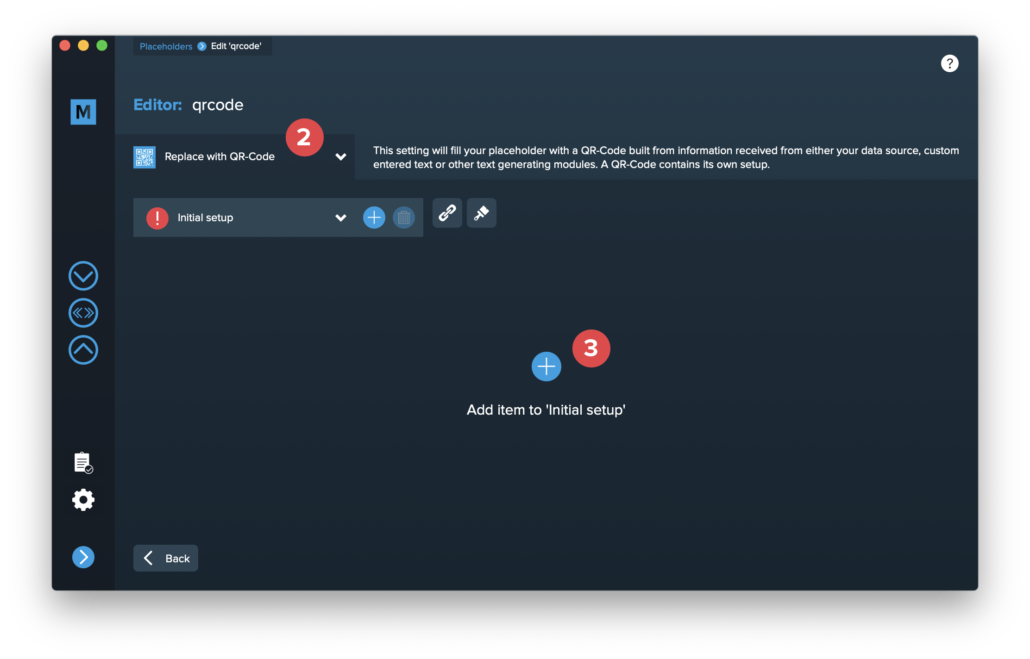
Open the Qr-Code placeholder by double clicking it (or click the pen icon), then the editor will open. First of all, make sure that “Replace with QR-Code” is selected [2]. If you cannot select it, you didn’t follow the requirements for a QR-Code placeholder in the layout. Please check “Add placeholders to your layout” section above.
Then click “Add item to initial setup” [3]. This will automatically add a QR-Code Element and open the QR-Code editor.
Select the type of QR-Code you want to create [4]. Please note that some QR-Code types have optional items [5] which you can enable if you need them.
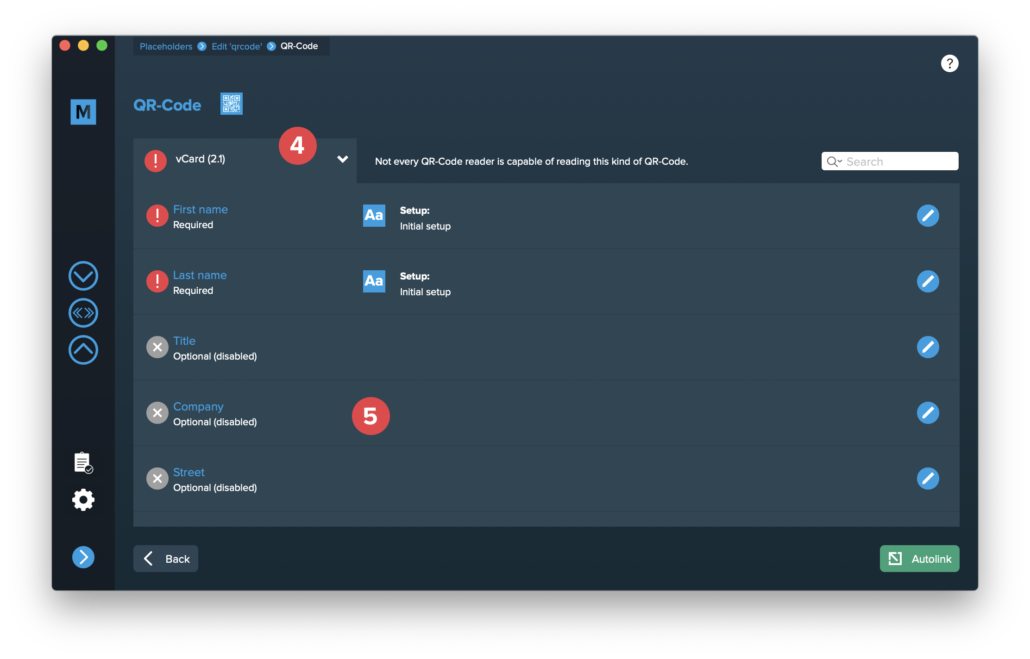
Double click the single items to edit them. The content of a QR-Code is always text, so the single items are handled like a standard text placeholder which you fill from various sources.
These sources can be one or a combination of:
- Datasource content (Changes for each record)
- Static text (Always the same)
- Sequence (Different types of counting numbers)
- Automator workflow (for editing outside of MyDataMerge – learn more here)
- Custom (java-)script (learn more here)
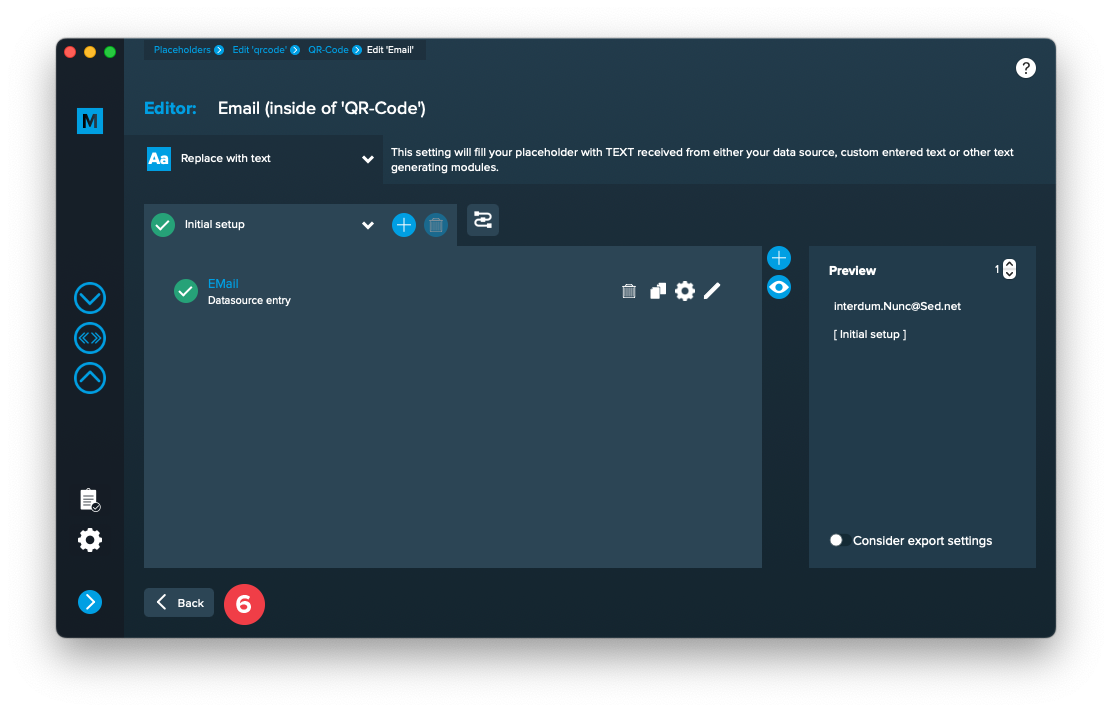
Once you configured all required (and optional) items and the setup is valid (green check), you can exit the QR-Code editor with the back button [6] …
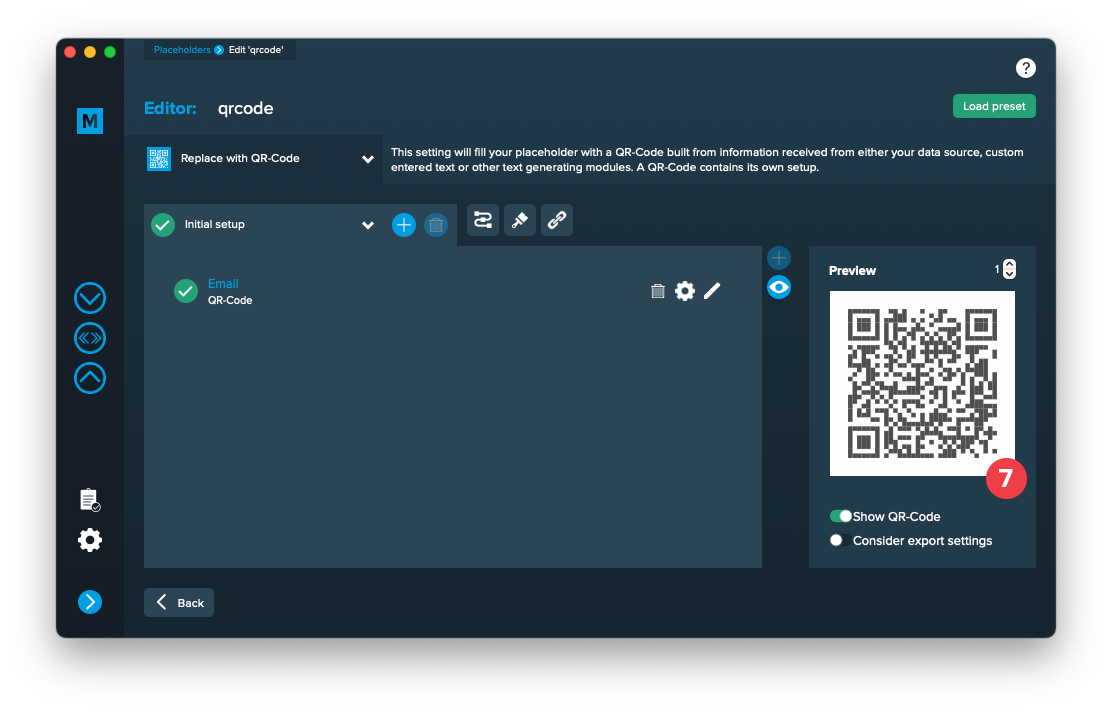
… and see a preview of the QR-Code [7].
3 Export
Filetypes
Export to Adobe InDesign® files
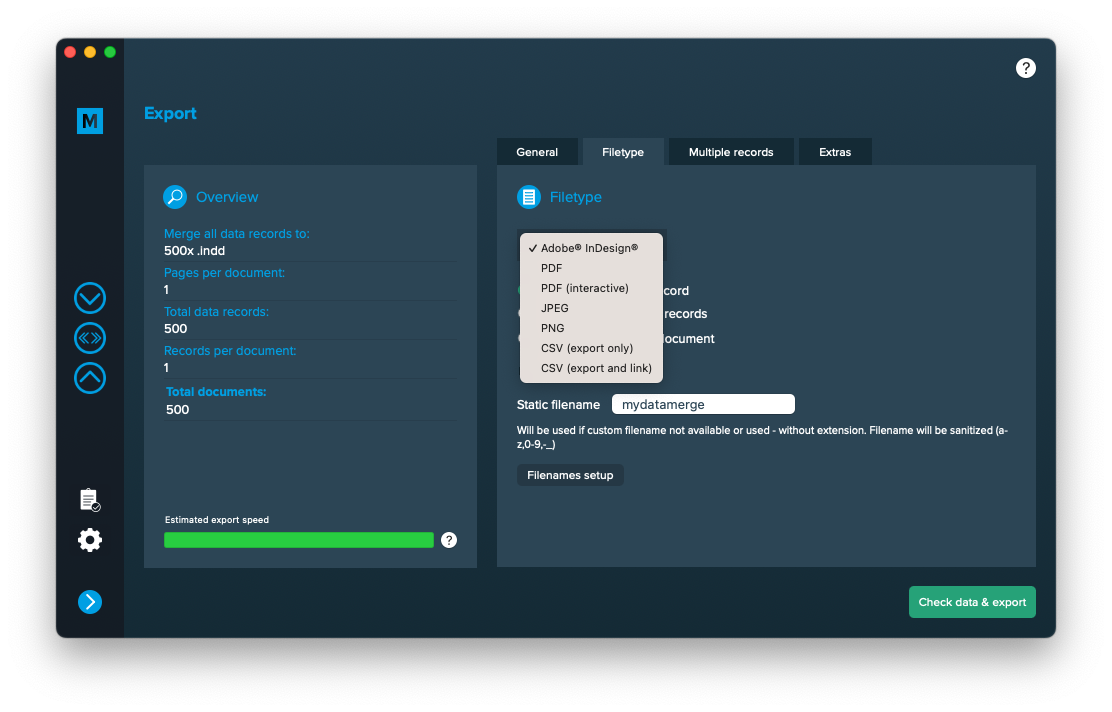
If you want to export to Adobe InDesign files go to export > filetype and select the preferred filetype from the dropdown.
Setup custom filenames
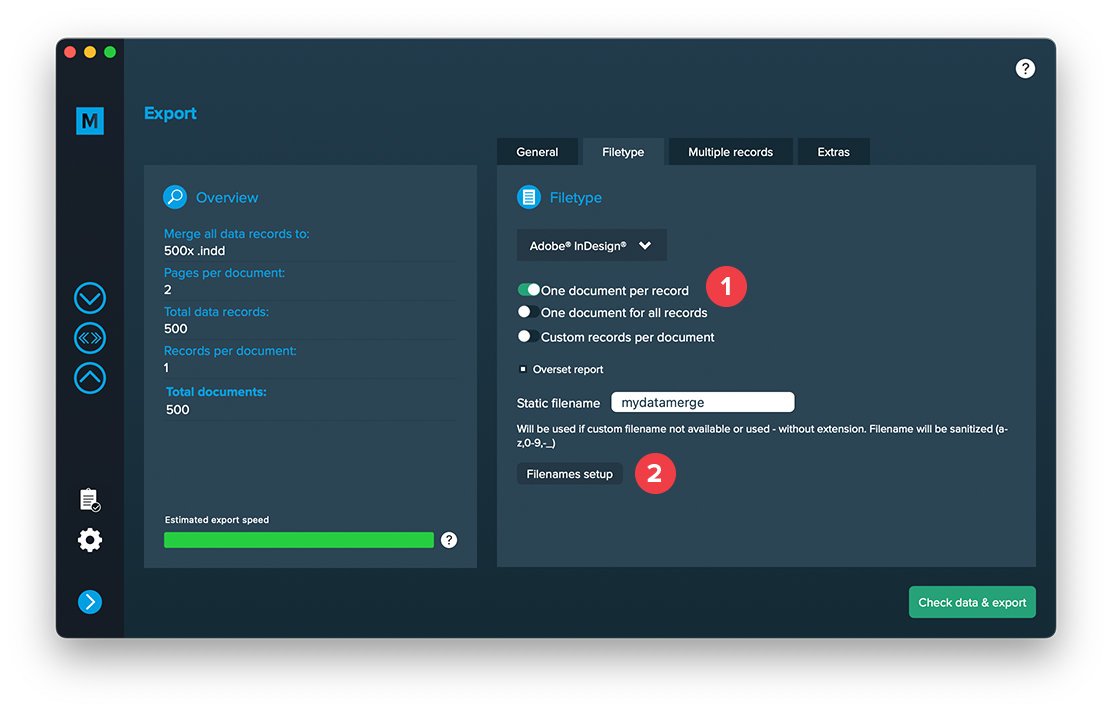
To configure dynamic file names go to Export > Filetype and make sure “One document per record” [1] is activated. Then a button “Filenames setup” [2] appears. Click it to configure your filenames.
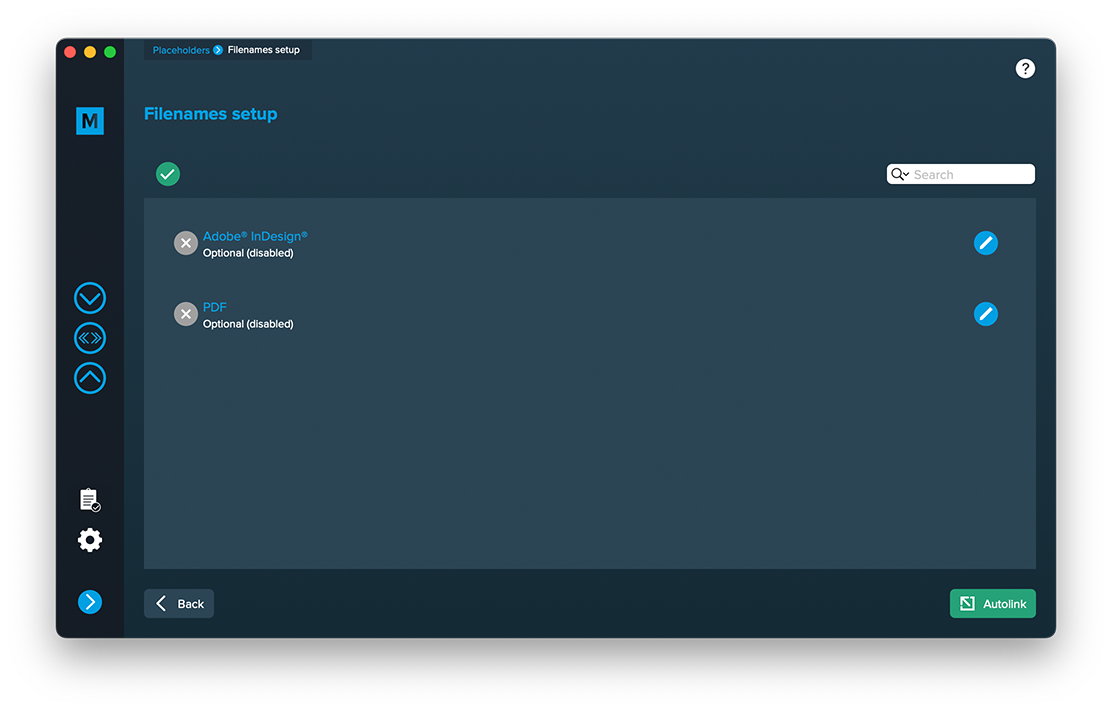
If you click the “Filenames setup” button you can then select the filetype to setup custom naming. If you e. g. export to PDF files and keep a copy of your InDesign files you can define both the names for the PDF files and the InDesign files. Double click a row and enable it. Then you can configure it like a placeholder.
Extras
Setup GREP replacements
GREP text actions allow you to search and replace specific strings matching custom search patterns with other strings or patterns AFTER the merge process is completed. They are applied to all documents generated.
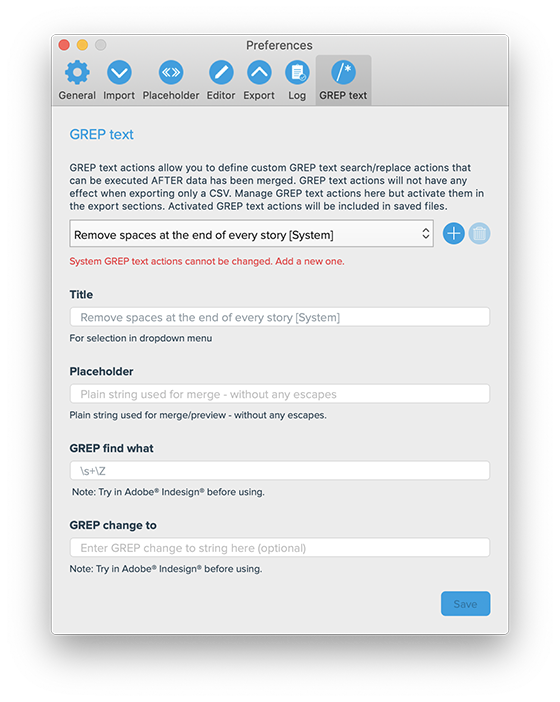
Go to Export > Extras > GREP text
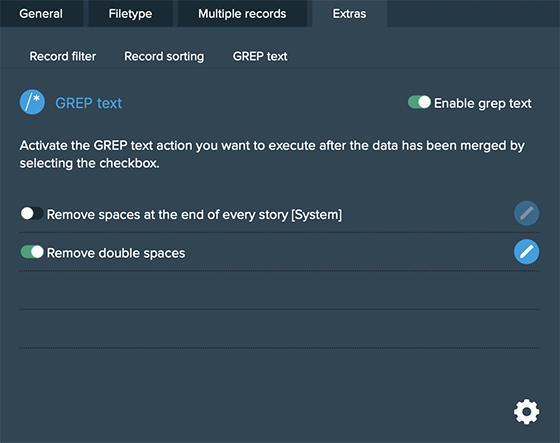
Here you can activate or deactivate your configured GREP text replacements. To edit them click on the pen icon of each row, to add new ones click on the gear icon in the bottom right. This will take you to the preferences where you can add new actions or delete existing ones (Note: Predefined actions cannot be deleted. They are flagged with [System] at the end of the name):
GREP text actions are stored locally on your machine. Only activated actions will be added to project files.