1 Layout preparation & import
Add placeholders to your layout
Add colored QR-Code placeholder
Requirements
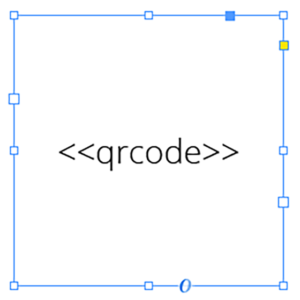
- The placeholder text must be located in a single text frame (not linked with any other)
- The text frame must be a square (same height and width)
- The placeholder text including tags must be the only content of the text frame (be careful with spaces)
- You can choose any text you like (a-z, 0-9, _-)
- If you want to use Autolink you can add # to identify the placeholder as QR-Code, e.g. <<#qrcode>>
Coloring QR-Codes
To color your QR-Codes, you just need to apply a color to your text frame and the text. The text frame’s color will be the background color of the QR-Code, the text color will result in the QR-Codes color itself.
Best practice: Even if you don’t need a background color (e.g. cause it is white) you still should set a color. This speeds up the merge process.

2 MyDataMerge configuration
Editing QR-Code placeholders
Setup QR-Code placeholders
A QR-Code placeholder will add a specific type of QR-Code (vCard, URL, Text) with content from various sources into your layout in the merge process.
These sources can be one or a combination of:
- Datasource content (Changes for each record)
- Static text (Always the same)
- Sequence (Different types of counting numbers)
- Automator workflow (for editing outside of MyDataMerge – learn more here)
- Custom (java-)script (learn more here)
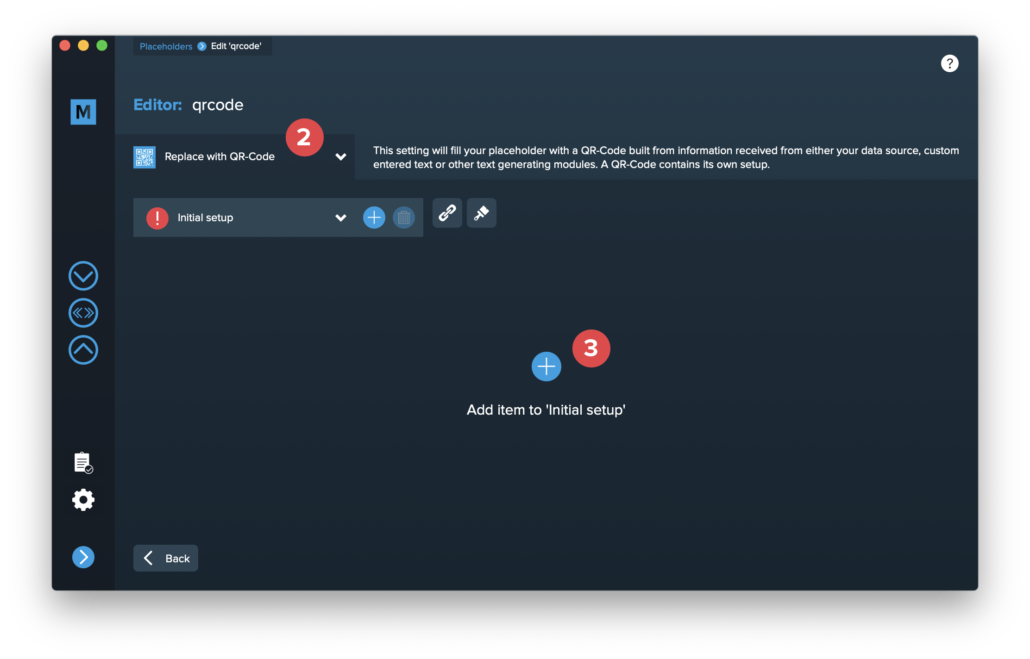
Open the Qr-Code placeholder by double clicking it (or click the pen icon), then the editor will open. First of all, make sure that “Replace with QR-Code” is selected [2]. If you cannot select it, you didn’t follow the requirements for a QR-Code placeholder in the layout. Please check “Add placeholders to your layout” section above.
Then click “Add item to initial setup” [3]. This will automatically add a QR-Code Element and open the QR-Code editor.
Select the type of QR-Code you want to create [4]. Please note that some QR-Code types have optional items [5] which you can enable if you need them.
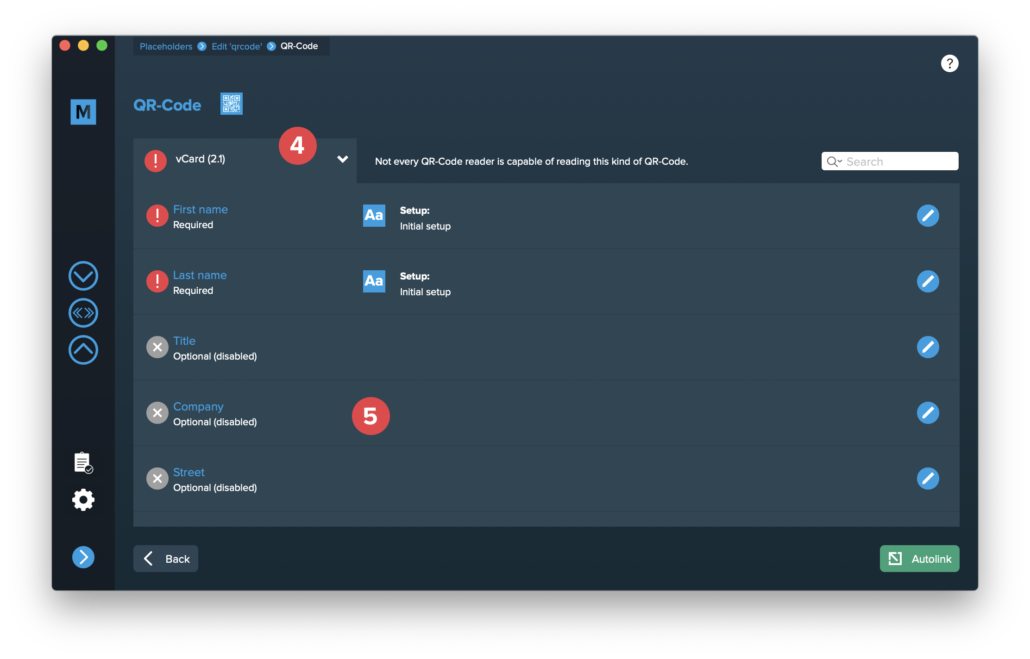
Double click the single items to edit them. The content of a QR-Code is always text, so the single items are handled like a standard text placeholder which you fill from various sources.
These sources can be one or a combination of:
- Datasource content (Changes for each record)
- Static text (Always the same)
- Sequence (Different types of counting numbers)
- Automator workflow (for editing outside of MyDataMerge – learn more here)
- Custom (java-)script (learn more here)
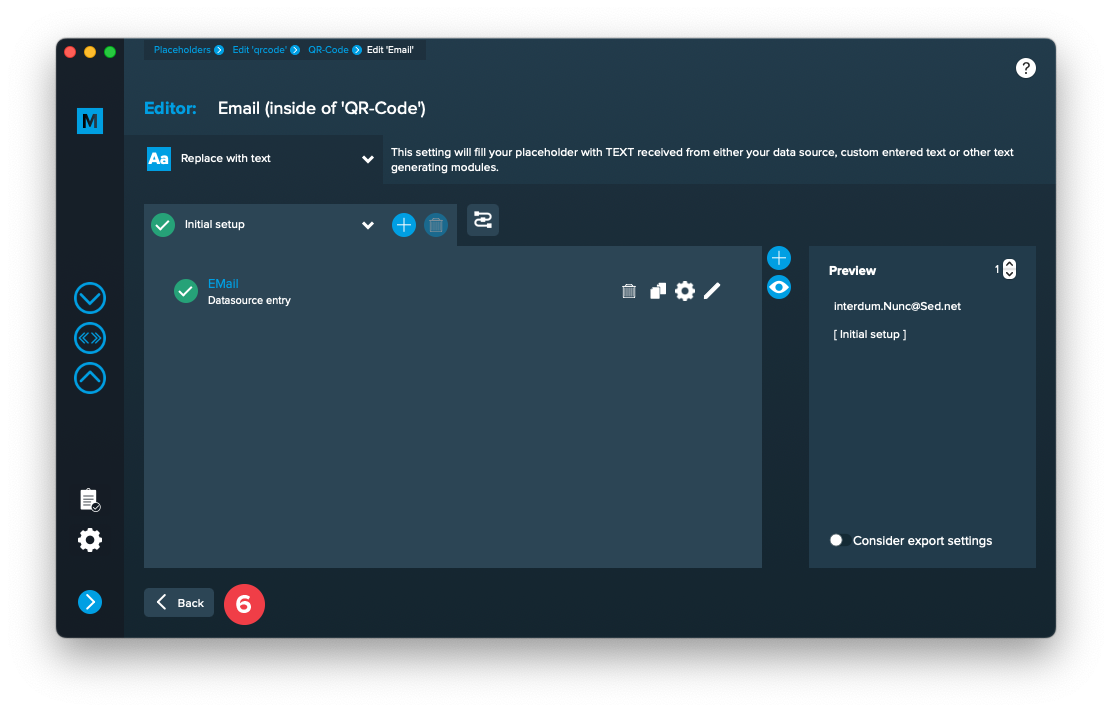
Once you configured all required (and optional) items and the setup is valid (green check), you can exit the QR-Code editor with the back button [6] …
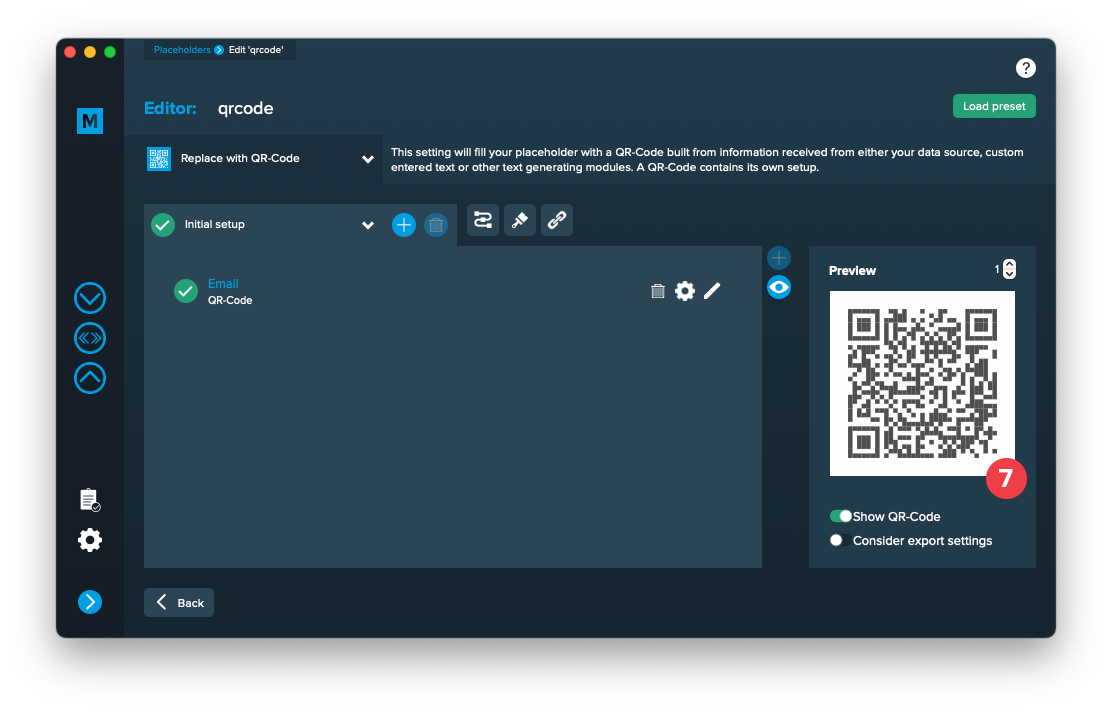
… and see a preview of the QR-Code [7].
3 Export
Filetypes
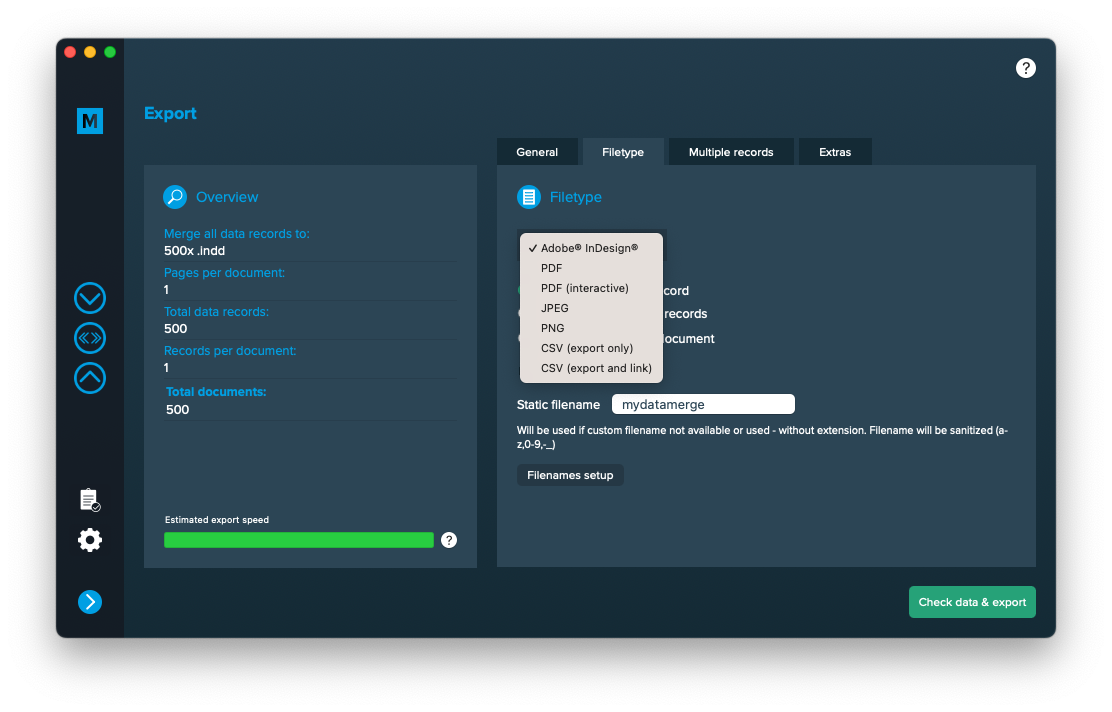
Export to interactive PDF files
If you want to export to interactive PDF files go to export > filetype and select the preferred filetype from the dropdown.
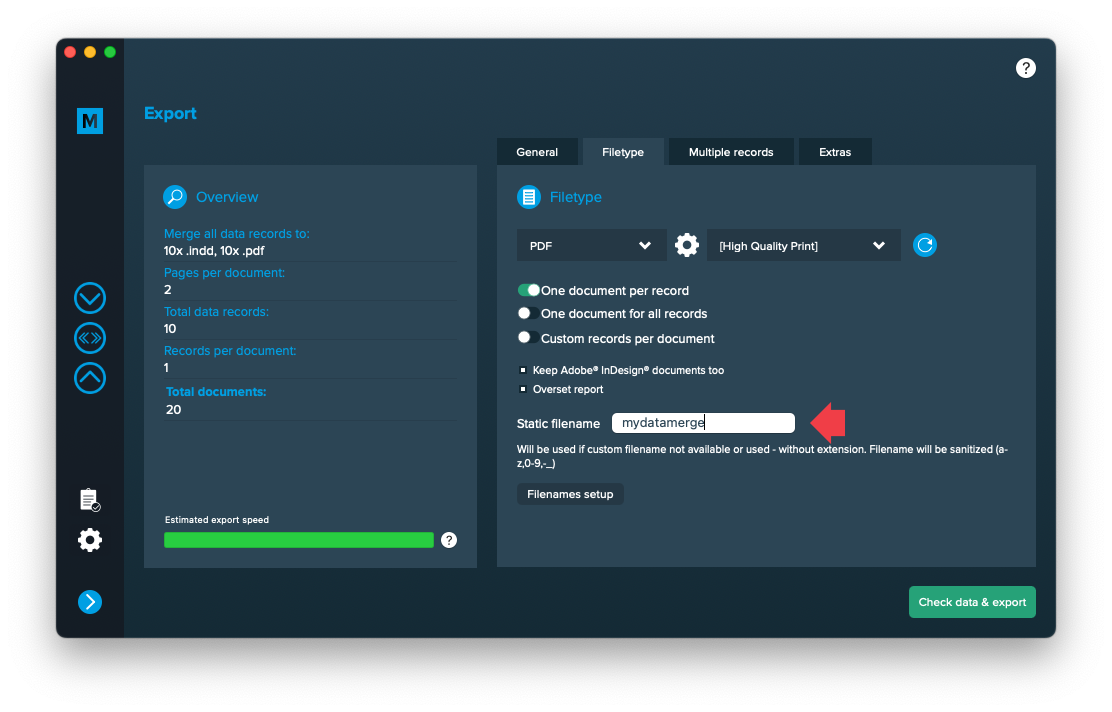
Use a static filename with counting number
You can set a static filename in Export > Filetype > “Static filename” field.
With static filenames, every file will get the same name and a counting number will be attached. For example if you define static filename to be “mydatamerge” then files will be named like this:
- mydatamerge_1
- mydatamerge_2
- mydatamerge_3
- and so on
Please note that static filenames only allow a-z, 0-9, – and _ characters. Other characters will be removed or replaced.