1 MyDataMerge configuration
Editing image placeholders
Showing MyDataMerge where to look for images
To tell MyDataMerge where to look for your images, follow these instructions
- Make sure your placeholder has the right type selected “Replace with image” [1]
- Add a datasource entry and select the column with the image filenames [2]
- Open the settings (gear icon). Then choose the folder where the images are located [3]. This will add the selected path to your image filenames.
By now you should see the image in the preview (you might need to grant read access for MyDataMerge to the selected folder).

2 Export
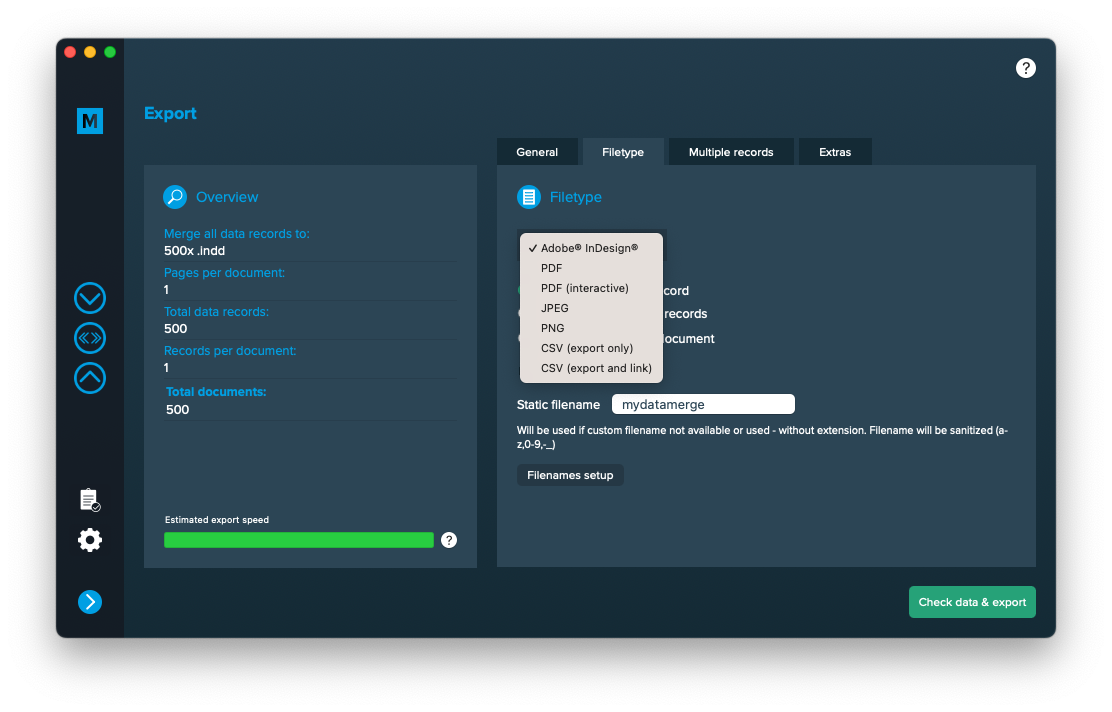
Filetypes
Export to Adobe InDesign® files
If you want to export to Adobe InDesign files go to export > filetype and select the preferred filetype from the dropdown.
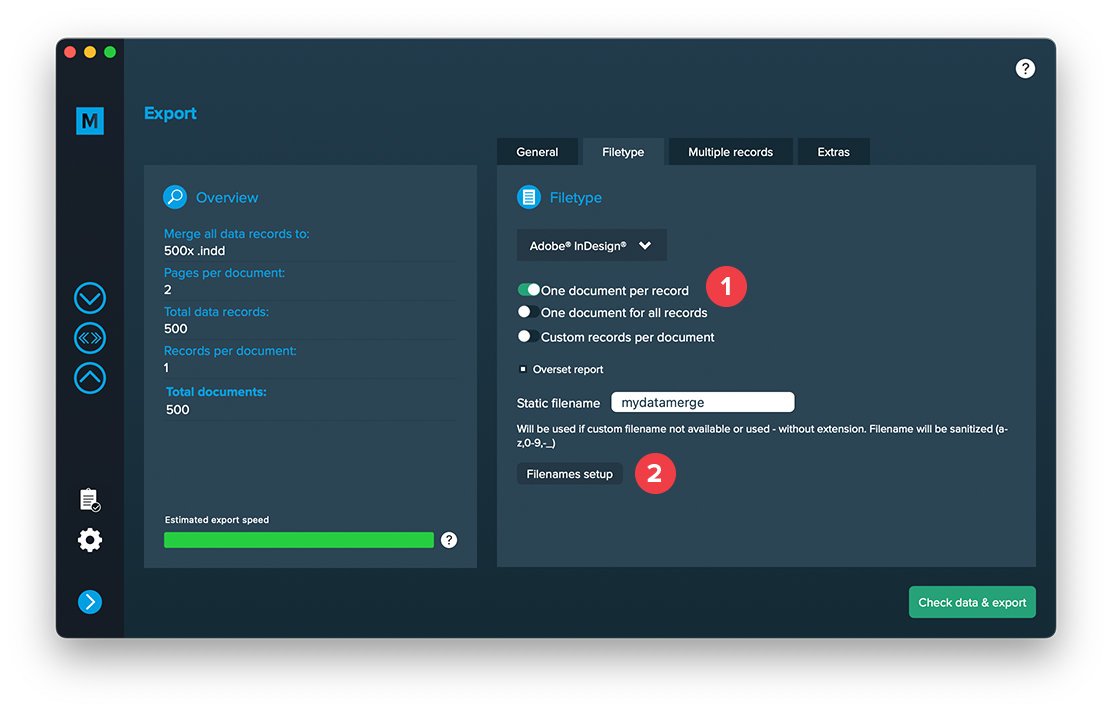
Setup custom filenames
To configure dynamic file names go to Export > Filetype and make sure “One document per record” [1] is activated. Then a button “Filenames setup” [2] appears. Click it to configure your filenames.
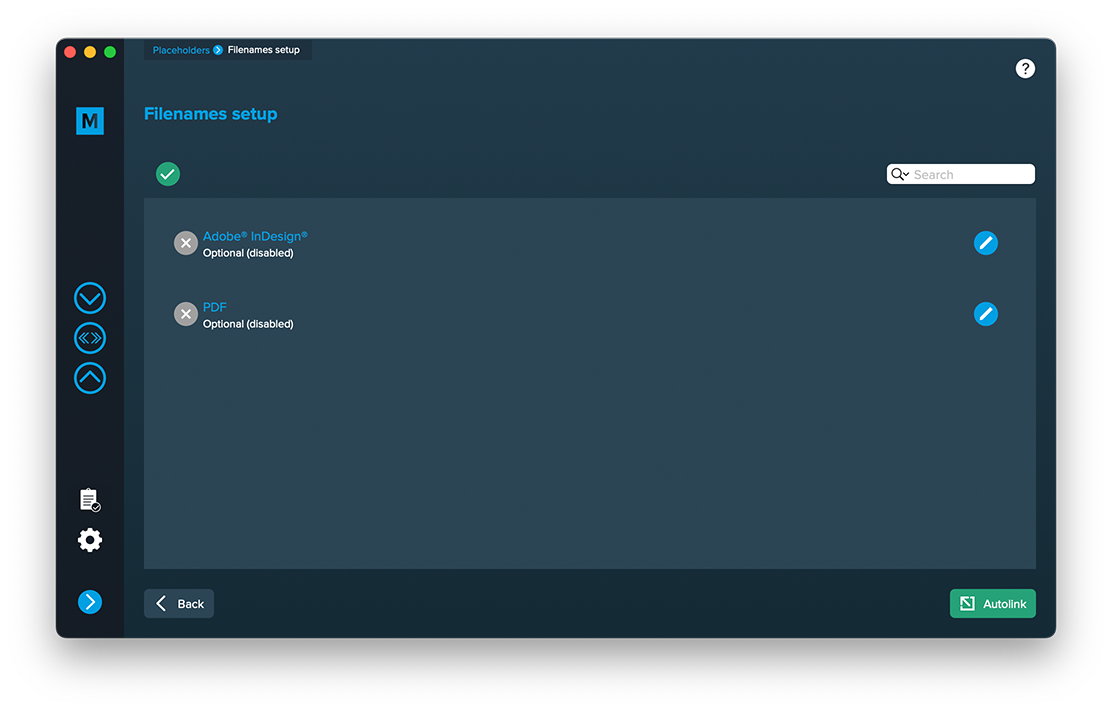
If you click the “Filenames setup” button you can then select the filetype to setup custom naming. If you e. g. export to PDF files and keep a copy of your InDesign files you can define both the names for the PDF files and the InDesign files. Double click a row and enable it. Then you can configure it like a placeholder.
Extras
Setup GREP replacements
GREP text actions allow you to search and replace specific strings matching custom search patterns with other strings or patterns AFTER the merge process is completed. They are applied to all documents generated.
Go to Export > Extras > GREP text
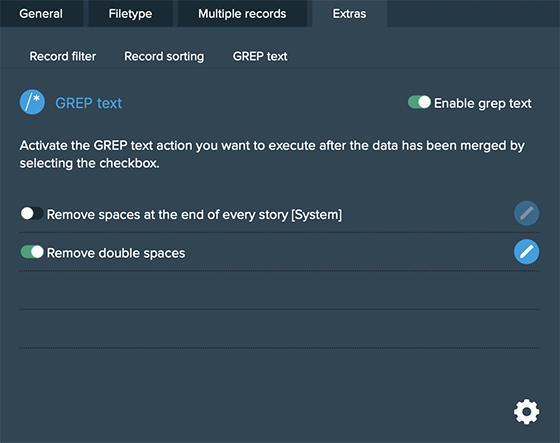
Here you can activate or deactivate your configured GREP text replacements. To edit them click on the pen icon of each row, to add new ones click on the gear icon in the bottom right. This will take you to the preferences where you can add new actions or delete existing ones (Note: Predefined actions cannot be deleted. They are flagged with [System] at the end of the name):
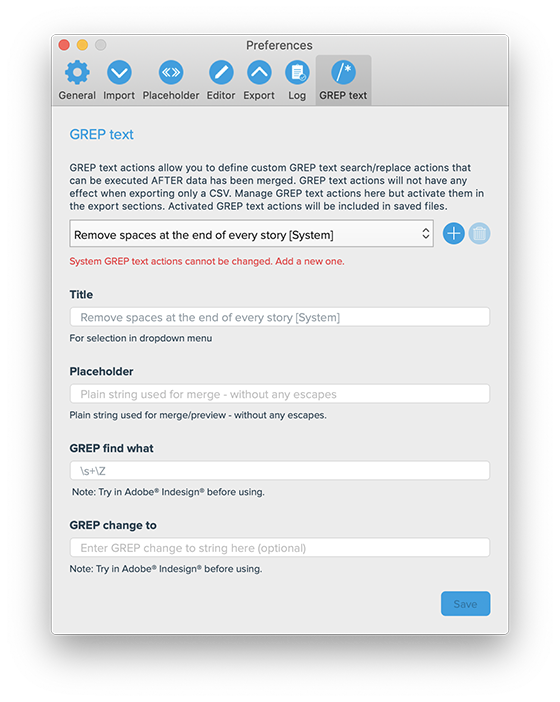
GREP text actions are stored locally on your machine. Only activated actions will be added to project files.